
Desserts
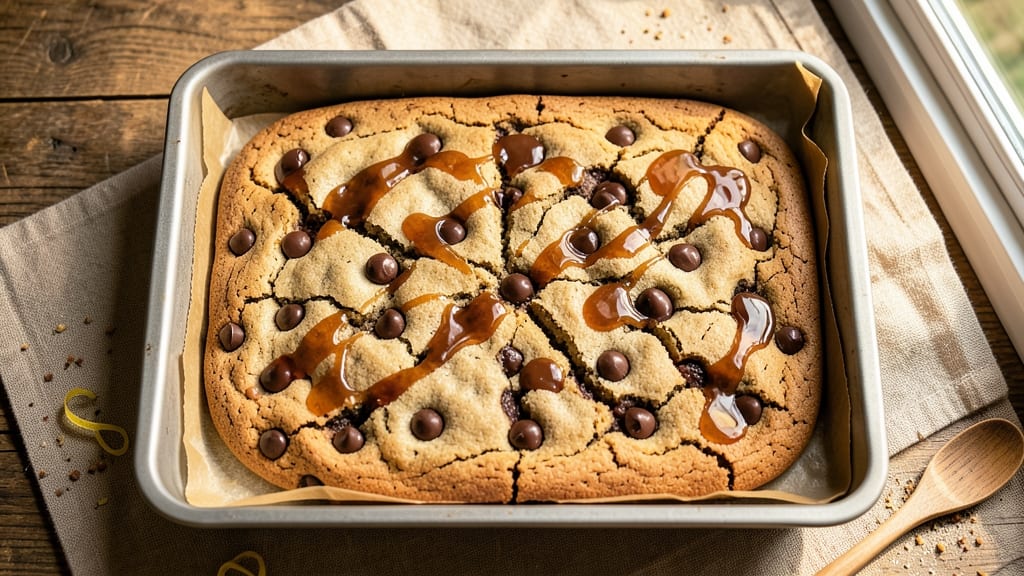
This chocolate caramel cookie bar recipe delivers the ultimate dessert experience—rich, fudgy layers with rivers of molten caramel that make every bite irresistible. The secret lies in precise layering and baking techniques that create a perfect balance between crisp edges and gooey centers.
I've perfected this recipe to ensure each component—chocolate cookie base, creamy caramel filling, and chocolate topping—comes together flawlessly in a standard 9x13-inch pan.
The process begins with a buttery, chocolatey cookie dough that spreads evenly in the pan, forming the foundation for the caramel rivers. Once baked to a golden hue, you'll spread a warm, gooey caramel layer that creates those signature molten pockets when sliced.
Topping it with melted chocolate ensures a glossy finish that adds extra richness. Every step is designed to maximize flavor while maintaining the structural integrity of each layer.
What you'll end up with is a decadent dessert that looks as impressive as it tastes—thick, fudgy bars with glossy chocolate on top and caramel oozing between every slice.
The contrast of textures and flavors makes this the perfect showstopper for dinner parties, holiday gatherings, or a special treat for yourself. The recipe is foolproof, with clear instructions for achieving that ideal balance between crisp and gooey.
Serve warm with a dusting of powdered sugar or an extra drizzle of caramel for added flair. These bars are best enjoyed within a few days, but they'll keep well in the refrigerator for up to five days, making them perfect for meal prep or gifting.
Let's get started on creating this showstopping dessert!
Ingredients for chocolate caramel cookie bar
These decadent ingredients create the perfect chocolate caramel cookie bars with fudgy layers and molten rivers.
| Ingredient | Amount | Notes |
|---|---|---|
| All-Purpose Flour 🌾 | 2 cups | Sifted for even texture |
| Granulated Sugar 🍚 | 1 ½ cups | White or light brown |
| Unsalted Butter 🧈 | 1 ½ cups | Cold, cubed for even melting |
| Semi-Sweet Chocolate Chips 🍫 | 1 ½ cups | High-quality, 60% cacao |
| Large Eggs 🥚 | 2 whole | Room temperature for blending |
| Vanilla Extract 🌿 | 2 tsp | Pure, high-quality extract |
| Salt 🧂 | ½ tsp | Fine sea salt preferred |
| Heavy Cream 🥛 | 1 cup | Full-fat for rich caramel |
| Granulated Sugar 🍚 | 1 cup | For caramel layer |
| Unsalted Butter 🧈 | ½ cup | For caramel layer |
| Dark Chocolate Bars 🍫 | 12 oz | 70% cacao, chopped fine |
| Powdered Sugar 🍚 | ¼ cup | For dusting, optional |
The chocolate chips and butter are non-negotiable for that rich, fudgy texture. Ghirardelli or Goya chocolate chips make all the difference—they melt perfectly and add that deep chocolate flavor. For the butter, Land O’Lakes or Plugrá are my go-tos, but any good-quality brand works. The semi-sweet chocolate bars for the topping should be at least 70% cacao for that perfect balance of sweetness and bitterness. Lindt or Guittard are great options if you want to splurge. Pro tip: buy chocolate bars in bulk—they stay fresh longer and save you money in the long run. The heavy cream for the caramel needs to be full-fat; anything less and your caramel won't be as rich and velvety.
No semi-sweet chocolate chips? Use chopped dark chocolate bars instead—just make sure they're at least 60% cacao. Running out of heavy cream? Substitute with whole milk plus a splash of cream cheese for the caramel, though the texture will be slightly lighter. Short on vanilla extract? Vanilla bean paste works too, or even a pinch of ground vanilla bean if you're feeling fancy. The powdered sugar is optional, but trust me, that dusting on top makes it look restaurant-worthy. If you can't find 70% cacao dark chocolate, 60% is fine, but the flavor will be sweeter. And if you're in a pinch, chop up a chocolate bar yourself—it's easier than you think!
These bars are best made a day ahead—the flavors meld beautifully overnight. Store them in an airtight container in the fridge for up to 5 days. For longer storage, freeze them for up to 3 months—just thaw at room temperature before serving. The caramel layer softens when cold, so let them sit at room temperature for about 10 minutes before slicing for those perfect molten pockets. And if you're making these for a crowd, double the recipe—they disappear fast!
Why You'll Love This Recipe
- No Mixer Needed: Mixing the dough is just flour, butter, and sugar—no electric mixer required. I use a sturdy wooden spoon and my hands, and it comes together faster than I expected, with zero fuss.
- Rich, Gooey Magic: That caramel swirl? It’s the star—smooth, buttery, and packed with chocolate chips melting into every bite. Honestly, the first time I cut into one, I nearly dropped the knife.
- Weeknight or Party: Slice into bars for a quick snack or bake the whole thing for a crowd. My kids grab them after school, and I’ve even brought a tray to potlucks—always disappears first.
- Budget-Friendly Luxury: Butter and chocolate chips might sound fancy, but this recipe stretches ingredients perfectly. One batch feeds my family for days, and the leftovers? Even better the next day.
Step-by-step instructions for chocolate caramel cookie bars
Here's how to create decadent layers of fudgy chocolate cookie and gooey caramel—every bite is pure indulgence.
Make the Chocolate Cookie Base
Preheat your oven to 350°F and line a 9x13-inch baking pan with parchment paper for easy removal. In a large mixing bowl, combine the 2 cups all-purpose flour, 0.5 tsp salt, and set aside. In a separate bowl, cream together the 1.5 cups unsalted butter and 1.5 cups granulated sugar using an electric mixer on medium speed until light and fluffy—about 3-4 minutes. The mixture should nearly double in volume and become pale.
Add the 2 whole large eggs, one at a time, mixing well after each addition. Then stir in the 2 tsp vanilla extract and the flour mixture. Fold in the 1.5 cups semi-sweet chocolate chips by hand until evenly distributed. Spread the dough evenly into the prepared pan and bake for 20-25 minutes until the edges are golden and the center is just set. Let it cool completely before adding the caramel layer.
Prepare the Rich Caramel Layer
In a medium saucepan, combine the 1 cup heavy cream, 1 cup granulated sugar, and 0.5 cup unsalted butter. Bring to a boil over medium-high heat, stirring constantly until the sugar dissolves completely. Reduce the heat to medium-low and simmer for 5-7 minutes until the mixture thickens slightly and coats the back of a spoon. This is your signature caramel layer—it should be smooth and glossy.
Remove from heat and carefully pour the caramel over the cooled cookie base. Use a spatula to spread it evenly, leaving a ½-inch border around the edges. Immediately sprinkle the top with the 12 oz finely chopped dark chocolate bars so they melt slightly into the caramel. Chill in the refrigerator for 30 minutes to set.
Add the Final Chocolate Layer
Once the caramel layer is firm, return the pan to the oven and bake at 350°F for 8-10 minutes until the chocolate on top is melted and bubbly. Watch closely—you want it just set enough to hold its shape but still gooey when cut. Remove from the oven and immediately dust the top with the 0.25 cup powdered sugar using a fine-mesh sieve for a snowy finish.
Let the bars cool completely at room temperature before cutting into 12 squares. The contrast of the warm, gooey caramel rivers between layers of rich chocolate cookie is what makes these bars irresistible. Store in an airtight container at room temperature for up to 5 days—if they last that long!
Pro Tips For Making Chocolate Caramel Cookie Bar
- Chill the Dough: I learned this the hard way—skipping the fridge makes the caramel spread like a lazy Sunday. Press the dough into the pan, cover, and refrigerate for at least 30 minutes (up to 24 hours if you’re patient). This keeps the chocolate chips from sinking and the caramel from turning into a sticky mess when you cut it later.
- Melt Butter Slowly: The butter and sugar combo is where flavor gets built, so don’t rush it. Melt the butter over low heat until it’s just starting to foam—then remove from heat and let it cool to 110°F (43°C) before mixing with sugar. Too hot, and the eggs will scramble; too cold, and the caramel won’t emulsify right.
- Use Room-Temp Eggs: Cold eggs make the dough fight you. Crack them into a bowl and let them sit for 10 minutes before mixing—this keeps the texture smooth and prevents pockets of raw egg in the center. (Yes, even if you’re impatient like me.)
- Preheat the Pan: A cold pan means uneven baking and a gummy center. Slide your cookie bar pan into a 350°F (175°C) oven for 5–10 minutes before adding the dough—this guarantees the edges set first and the caramel sets properly. No more waiting 15 minutes for the middle to cook while the edges burn.
Creative variations of this chocolate caramel cookie bar
Salted Caramel Twist
Add a pinch of flaky sea salt (about ¼ tsp) to your caramel layer before spreading it over the cookie base. The contrast of salty and sweet elevates the flavor profile dramatically. I like to sprinkle Maldon sea salt flakes on top after baking for a sophisticated touch. 💫
Peanut Butter Swirl
Fold ½ cup creamy peanut butter into the cookie dough before spreading it in the pan. After baking, spread the caramel layer as usual, then drizzle 2 tbsp melted peanut butter in zigzags over the caramel. This adds a nutty depth that pairs perfectly with the chocolate and caramel.
Espresso Chocolate Boost
For a mocha-inspired twist, add 1 tsp instant espresso powder to the cookie dough along with the vanilla extract. The coffee enhances the chocolate flavor without making the bars taste like dessert coffee.
I also like to sprinkle finely ground espresso beans on top before baking for extra aroma and texture.
White Chocolate Crunch
Replace half of the semi-sweet chocolate chips in the cookie dough with white chocolate chips (about ¾ cup). For the caramel layer, sprinkle ½ cup chopped white chocolate on top before chilling. The creamy white chocolate adds a delightful contrast to the rich dark chocolate topping.
Caramel Apple Cinnamon
Add 1 tsp cinnamon and ½ cup finely diced apples (like Granny Smith) to the cookie dough. For the caramel layer, stir in ½ tsp cinnamon and ¼ cup apple cider while simmering. This autumnal variation adds a fruity, spiced dimension that works beautifully with the chocolate.
Cookie Butter Layer
Spread a thin layer of cookie butter (like Nutella or SunButter) between the cookie base and caramel layer. Use about ¼ cup, spread evenly with a spatula.
This adds an extra layer of flavor and texture that cookie lovers will adore. The nutty or chocolatey undertones complement the caramel beautifully.
Nutrition facts
Frequently asked questions
Why does my caramel layer turn grainy or crystallize?
Caramel crystallizes when it cools too quickly or when the sugar isn't fully dissolved. Always stir constantly while heating to medium-high heat until the sugar completely dissolves (no graininess). Remove from heat immediately after reaching the right consistency—it thickens as it cools. If it starts to crystalize after pouring, gently reheat it over low heat while stirring until smooth again.
Can I make these bars gluten-free?
Replace the all-purpose flour with a 1:1 gluten-free baking flour blend (like Bob's Red Mill). For best results, add ½ tsp xanthan gum to help bind the dough. Keep all other ingredients the same, but be prepared for slightly denser texture. Chill the dough for 30 minutes before baking to prevent spreading.
How do I prevent the chocolate topping from melting too much?
Bake the final chocolate layer for just 8-10 minutes at 350°F—watch closely! The chocolate should be set but still slightly gooey when cut. If it's melting too fast, reduce oven temp to 325°F next time. For extra stability, chill the pan for 5 minutes after baking before dusting with powdered sugar.
Can I use store-bought cookie dough instead?
While possible, it won't give you the same rich, fudgy texture. Store-bought dough often contains more leavening agents that make it too light. For best results, stick with the homemade cookie base—it's the foundation for those perfect molten caramel pockets. If you're short on time, try a high-quality refrigerated cookie dough (like Pepperidge Farm) for a compromise.
How do I fix if my caramel layer sinks into the cookie base?
This usually happens if the cookie base isn't fully cooled before adding caramel. Always let the cookie layer cool completely (even 30 minutes in the pan) before pouring caramel. For extra insurance, chill the pan in the freezer for 5 minutes before adding the caramel layer. This creates a firmer foundation that holds up better.