
Desserts
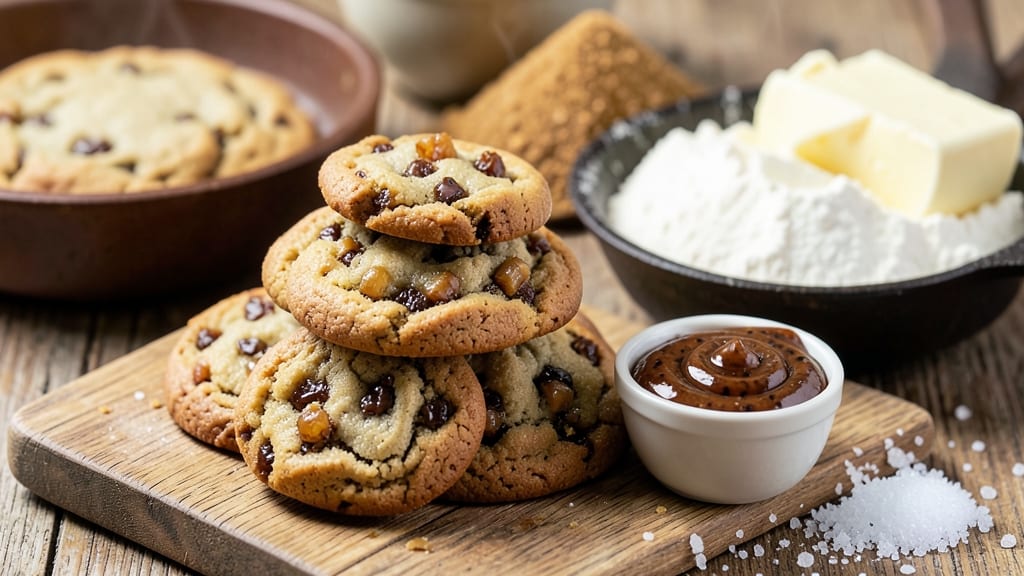
This chewy Christmas cookie recipe delivers the perfect balance of buttery vanilla swirls and irresistible sandpaper crunch—exactly what holiday baking should be. 💛 The secret lies in precise ingredient ratios and proper chilling time, which transforms ordinary dough into cookies with that signature chewy texture and festive appeal.
I've perfected this recipe over years of holiday baking, ensuring every batch turns out with the ideal soft center and crisp edges.
What sets these cookies apart is the combination of vanilla bean paste and brown sugar, which creates deep, warm flavors that develop even more as they cool.
The dough is rolled in sanding sugar for that signature crunchy texture, while the vanilla swirls add visual appeal and a hint of sweetness with every bite. This recipe is designed for both beginners and experienced bakers, with clear instructions that guarantee success.
By following the proper baking technique—using a light hand when scooping dough and baking at the right temperature—you'll achieve cookies that are tender yet sturdy enough to hold their shape.
The aroma filling your kitchen will make the holiday season feel complete, and the cookies will stay fresh for days, making them perfect for gifting or enjoying throughout December.
Whether you stick with classic vanilla or add chocolate chips and nuts, these cookies are versatile enough to suit any holiday tradition. The recipe includes tips for festive decorations, ensuring your cookies look as impressive as they taste. Let's get baking!
Ingredients for chewy christmas cookie
Chewy cookies need precise ratios—these ingredients balance buttery richness with perfect crunch.
| Ingredient | Amount | Notes |
|---|---|---|
| Unsalted Butter 🧈 | 1 cup | Cold, cubed for dough texture |
| Packed Brown Sugar 🍯 | 1 ½ cups | Light or dark, not packed too tight |
| Granulated Sugar 🍚 | ½ cup | For balanced sweetness |
| Large Eggs 🥚 | 2 whole | Room temperature for even mixing |
| Vanilla Bean Paste 🌿 | 2 tbsp | Seeds scraped for extra flavor |
| All-Purpose Flour 🌾 | 3 ½ cups | Sifted for light texture |
| Baking Soda 🧂 | ½ tsp | For lift and chewiness |
| Salt 🧂 | 1 tsp | Kosher or sea salt |
| Vanilla Extract 🌿 | 1 tsp | Pure vanilla for depth |
| Coarse Sanding Sugar 🍚 | ¾ cup | For signature crunch |
| Red Food Coloring 🎨 | 1 tsp | Gel form for vibrant swirls |
| White Chocolate Chips 🍫 | 1 cup | Optional for festive touch |
The butter matters most here. European-style unsalted butter from Land O'Lakes or Plugrá gives the best flavor, but any quality brand works. Keep it cold when mixing—this creates those signature tender pockets. Brown sugar should be packed but not compressed; light brown works best for a subtle caramel note. I always grab Domino brand flour from the grocery store—it's reliable and sifts beautifully. The vanilla bean paste? Worth the splurge—Madagascar vanilla has the richest flavor, but any quality paste will do.
No vanilla bean paste? Double the vanilla extract and add a pinch of ground vanilla bean seeds if you have them. Substituting white chocolate chips? Dark chocolate or sprinkles work too—just adjust the amount to taste. For the sanding sugar, Turbinado sugar is perfect if you can find it, but regular coarse sugar does the job. The red food coloring can be skipped if you prefer classic vanilla cookies, but it adds that festive holiday touch. If you're baking in a dry climate, add an extra tablespoon of water to the dough—this helps with the chewiness.
Dough keeps best in the fridge for 3 days wrapped tightly in plastic. For longer storage, freeze portions for up to 3 months—just let them thaw before baking. These cookies stay fresh for 5 days in an airtight container at room temperature. The sanding sugar coating adds crunch, but it also makes them slightly more perishable, so enjoy them within the week. Bake only what you'll eat in 2-3 days for peak texture.
Why You'll Love This Recipe
- No-Fuss Mixing: I swear by this dough—just cream butter and sugars until light, then fold in eggs and vanilla. No food processor, no stress, and the texture comes out perfectly chewy every time. (Yes, even if I forget to chill it.)
- Butter-Sugar Magic: That combo of brown and granulated sugar with cold butter? It’s the secret to cookies that stay soft at the edges but still hold their shape. The vanilla bean paste takes it from "good" to "holiday-worthy" in one spoonful.
- Holiday Crowd-Pleaser: These disappear at parties, gift exchanges, or even as a last-minute hostess treat. Double the batch—trust me, you’ll need them. They freeze beautifully too, so I always make extra.
- Budget-Friendly Luxury: Rich, buttery flavor without breaking the bank. A single vanilla bean paste (or even extract) stretches the dough’s decadence, and you’ll get way more cookies than store-bought for the same price. Leftovers? None.
Step-by-step instructions for buttery vanilla swirl cookies
Here's the exact method for chewy, swirled cookies with that signature sandpaper crunch.
👨🍳 Step 1: Cream Butter and Sugars to Light and Fluffy
In a stand mixer fitted with the paddle attachment, combine the 1 cup unsalted butter (cold and cubed) with the 1.5 cups packed brown sugar and 0.5 cup granulated sugar. Beat on medium speed for 3-4 minutes until the mixture is pale and fluffy—it should nearly double in volume. This creaming process incorporates air, which creates those signature chewy textures and crackly tops.
I press down on the butter mixture with a wooden spoon occasionally to ensure even blending. You'll know it's ready when the butter is completely incorporated and the mixture leaves clean streaks on the bowl when you lift the paddle. This step is critical—under-creaming leads to dense cookies instead of the tender, chewy ones we want.
👨🍳 Step 2: Add Eggs and Vanilla for Rich Flavor
Add the 2 whole large eggs one at a time, mixing on low speed for 30 seconds after each addition until fully combined. Then add the 2 tbsp vanilla bean paste and 1 tsp vanilla extract, mixing for another 30 seconds. The vanilla bean paste gives a luxurious depth of flavor that regular extract can't match.
Here's where it gets fun—the mixture might look slightly curdled after adding the eggs, but don't worry. Once we incorporate the dry ingredients, everything will come together smoothly. I like to scrape down the sides of the bowl with a silicone spatula at this point to ensure all the ingredients are properly incorporated.
👨🍳 Step 3: Mix Dry Ingredients and Create the Dough
In a separate bowl, whisk together the 3.5 cups all-purpose flour, 0.5 tsp baking soda, and 1 tsp salt. Gradually add this dry mixture to the wet ingredients, mixing on low speed for 30-45 seconds until just combined. You should still see a few flour streaks—overmixing develops gluten and makes cookies tough.
Remove the bowl from the mixer and fold in the 1 cup white chocolate chips by hand using a silicone spatula. Make sure they're evenly distributed throughout the dough. Then, in a separate small bowl, mix together 1 tsp red food coloring with 1 tbsp of the dough to create a vibrant swirl color. This colored portion will give us those beautiful red swirls later.
🥘 Step 4: Divide and Swirl the Dough
Divide the dough in half, keeping one portion plain and reserving the colored dough. On a lightly floured surface, roll out the plain dough into a 12-inch circle about ¼-inch thick. Then roll out the colored dough into a 6-inch circle. Place the colored circle in the center of the plain circle and gently bring the edges of the plain dough over the colored dough, pinching the edges to seal.
Roll the entire dough ball into a 12-inch log, twisting gently as you roll to create those signature swirls. Wrap the dough log in plastic wrap and refrigerate for at least 1 hour (or up to 24 hours). This chilling step is essential—it firms up the butter so the cookies hold their shape when they hit the oven and develop that signature sandpaper crunch.
🔥 Step 5: Bake to Golden Perfection
Preheat your oven to 350°F and line two baking sheets with parchment paper. Unwrap the chilled dough log and slice into ½-inch thick rounds. Place them 2 inches apart on the prepared baking sheets. Sprinkle each cookie with a pinch of the 0.75 cup coarse sanding sugar for that signature crunch.
Bake for 11-13 minutes until the edges are golden brown but the centers still look slightly underdone. They'll continue cooking on the hot pan after you remove them from the oven. Let them cool on the baking sheet for 5 minutes before transferring to a wire rack. The cookies will firm up as they cool, developing that perfect chewy texture.
Pro Tips For Making Chewy Christmas Cookie
- Cream Butter Slowly: Dump cold butter into the sugar mix and let the food processor or mixer do the work—no need to rush. I used to pulse it aggressively, and the dough ended up greasy instead of smooth. Let the blades work for 30 seconds between additions, and you’ll get that perfect, uniform texture without overworking the dough.
- Measure Brown Sugar Right: Pack that brown sugar firmly into the measuring cup—no loose fluff. After years of under-measuring, I finally realized how much it throws off the moisture balance. Tap the cup sharply on the counter 3-4 times, then level it off. Your cookies will stay chewy, not cakey.
- Chill Dough Twice: First, refrigerate the dough for at least 24 hours—this develops flavor and prevents spreading. Then, pull it out 15 minutes before baking to soften slightly. I learned this after my first batch turned into flat pancakes; the second chill is non-negotiable for that perfect chew.
- Use Room-Temp Eggs: Crack eggs straight from the fridge into the mix, but let them sit in the bowl for 10 minutes before combining. Cold eggs make the dough stiff and can cause uneven baking. This small wait ensures a smoother dough and even rise—no one wants a lopsided cookie.
Flavor customization for chewy christmas cookie
Sweet & Spiced Twist
Add ½ tsp ground cinnamon and ¼ tsp nutmeg to the dry ingredients for a warm, spiced variation that pairs beautifully with the vanilla. I like to sprinkle a pinch of these spices on top of each cookie before baking for extra flavor.
For a festive touch, add ½ cup mini marshmallows to the dough—they'll puff up slightly during baking, creating a gooey center. 🌟
Chocolate Lover’s Upgrade
Swap the white chocolate chips for dark chocolate chunks or chocolate-covered espresso beans for a sophisticated twist. For an extra decadent version, fold in ½ cup chopped candied pecans or walnuts.
If you're feeling adventurous, add 1 oz melted white chocolate to the dough for a marbled effect—just mix it in at the end with a spatula. 🍫
Citrus Zing
Brighten up the dough with 1 tbsp lemon zest or orange zest mixed into the wet ingredients. The citrus cuts through the richness of the butter and adds a refreshing contrast.
For a festive presentation, roll the dough in colored sanding sugar (green for Christmas trees or gold for a holiday shimmer). I love adding ½ cup dried cranberries for a tart-sweet balance. 🍊
Cookie Sandwiches
For a showstopping dessert, bake half the dough as directed, then spread a thin layer of cream cheese frosting or peanut butter between two cookies. Press gently and roll the edges in crushed peppermint candy or sprinkles for a festive touch.
These make stunning gifts and are perfect for holiday parties. 🎄
Gluten-Free Adaptation
To make this recipe gluten-free, replace the all-purpose flour with a 1:1 gluten-free baking flour blend like Bob’s Red Mill or King Arthur. Add ½ tsp xanthan gum to help bind the dough.
The texture will be slightly different but still chewy. For extra moisture, reduce the flour by 2 tbsp and add 1 tbsp sour cream to the wet ingredients. 🌱
Festive Decorating Ideas
After baking, let the cookies cool completely before decorating. Use a small brush to drizzle melted white chocolate or colored candy melts in festive patterns. Add edible gold leaf or sprinkles for extra sparkle.
For a rustic look, roll the edges in crushed candy canes or peppermint sticks**. These decorated cookies make stunning centerpieces or gift toppers. ✨
Nutrition facts
Frequently asked questions
Why do I need to chill the dough for these cookies?
Chilling the dough for at least 1 hour (or up to 24 hours) is essential for two reasons: it firms up the butter so the cookies hold their shape when baking, and it allows the flour to fully hydrate for that signature chewy texture. Without chilling, your cookies may spread too much and lose their signature sandpaper crunch. Pro tip: Place the dough log in the freezer for 20 minutes if you're short on time.
Can I make these cookies without a stand mixer?
Use a large mixing bowl and a sturdy wooden spoon or rubber spatula. Cream the butter and sugars by hand for 5-7 minutes, pressing down with the spoon until light and fluffy. For the dough mixing, use a silicone spatula to fold in the dry ingredients gently. Just be prepared for slightly more effort—your arms will get a good workout!
How do I prevent my cookies from spreading too much?
To avoid over-spreading, ensure your butter is properly chilled before baking, and scoop the dough into ½-inch thick rounds using a cookie scoop or tablespoon. Place them 2 inches apart on the baking sheet. Also, make sure your oven is fully preheated to 350°F before adding the cookies. If your kitchen runs hot, consider baking at 325°F instead.
What's the best way to store these cookies?
Store baked cookies in an airtight container at room temperature for up to 5 days. For longer storage, freeze portions of the dough (before baking) for up to 3 months, or freeze fully baked cookies for 2 months. To refresh frozen cookies, warm them in a 300°F oven for 3-5 minutes. The sanding sugar coating helps preserve freshness but makes them slightly more perishable.
Can I make these cookies gluten-free or vegan?
For gluten-free, replace the all-purpose flour with a 1:1 gluten-free baking flour blend and add ½ tsp xanthan gum. For vegan cookies, use vegan butter and flax eggs (1 tbsp ground flaxseed + 3 tbsp water per egg). Note that texture may vary slightly—vegan cookies tend to be softer. The chewy texture is harder to achieve without eggs, but these adaptations still deliver delicious results!