
Desserts
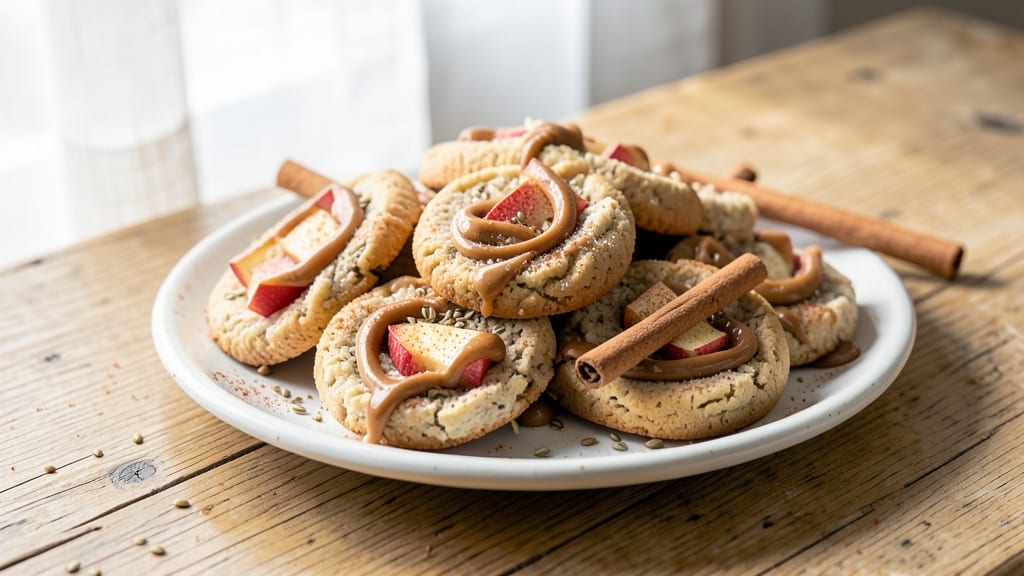
This apple dog cookie recipe transforms simple pantry staples into irresistible treats your pup will beg for—packed with the natural sweetness of apples and the protein boost of peanut butter. 💛 The secret lies in using dog-safe ingredients like oat flour and cinnamon, which add flavor without the risks of chocolate or xylitol.
I developed this recipe after my own dog refused store-bought treats, craving something homemade with real, wholesome ingredients.
What makes these cookies special is their perfect balance of crunch and chewiness, achieved through a simple baking technique that ensures they’re easy to break but satisfying to eat. The apples provide fiber and vitamins, while the peanut butter offers healthy fats—ideal for active pups.
Best of all, the recipe requires just 15 minutes of prep and 12 minutes in the oven, making it perfect for busy pet owners who want to spoil their dogs without sacrificing quality.
By the time these golden-brown cookies cool, you’ll have a batch of irresistible, vet-approved treats that your dog will love and your heart will feel good about feeding. They’re portioned for small to medium-sized dogs, but you can easily adjust the batch size.
The aroma of cinnamon and apples will have your pup rushing to the kitchen the moment they’re done baking.
Store them in an airtight container for up to two weeks, or freeze for longer shelf life—because nothing beats the joy of watching your dog’s tail wag when you offer a homemade treat. Let’s get baking for your furry friend!
Ingredients for apple dog cookie
Pantry staples transformed into tail-wagging treats—just 13 wholesome ingredients for happy pups.
| Ingredient | Amount | Notes |
|---|---|---|
| Unsweetened Applesauce 🍎 | ½ cup | Dog-safe, unsweetened variety |
| Natural Peanut Butter 🥜 | ½ cup | Xylitol-free, creamy texture |
| Oat Flour 🌾 | 1 ½ cups | Blended from rolled oats |
| Ground Flaxseed 🌿 | ¼ cup | For omega-3 boost |
| Ground Cinnamon 🍃 | 1 tbsp | Pure, no additives |
| Baking Powder 🧂 | ½ tsp | Aluminum-free preferred |
| Dog-Safe Vanilla Extract 🌸 | ½ tsp | Pure, no alcohol |
| Unsalted Butter 🧈 | ¼ cup | Cold, cubed for dough |
| Dog-Safe Honey 🍯 | 1 tbsp | Raw, unprocessed honey |
| Egg 🥚 | 1 whole | Room temperature |
| Dog-Safe Carrot 🥕 | ¼ cup | Finely grated, for extra veggies |
| Dog-Safe Blueberries 🫐 | ¼ cup | Fresh or frozen, chopped |
| Dog-Safe Pumpkin Puree 🎃 | ¼ cup | Plain, no spices added |
The peanut butter is non-negotiable—creamy, xylitol-free is a must, and Natural Jif or Smucker's are safe bets. Applesauce should be unsweetened (check labels—Mott's is a reliable brand), and if you can't find oat flour, blend rolled oats in a food processor for the same texture. For the cinnamon, McCormick or Spicewalla are pure options—avoid blends with added sugar. The blueberries and pumpkin puree add natural sweetness and nutrients, but if your pup isn't a fan, skip them entirely—this recipe is flexible!
No peanut butter? Sunflower seed butter works just as well—just ensure it's free of xylitol. Short on applesauce? Mashed banana or unsweetened applesauce substitute in equal amounts. The flaxseed can be swapped for chia seeds if you prefer, though flax offers more omega-3s. For the butter, coconut oil is a dairy-free alternative, and if you're avoiding eggs, 1 tbsp ground flaxseed + 3 tbsp water replaces the binding power perfectly. The baking powder should be fresh—test by mixing with water; if it fizzes, it's good to go!
These cookies stay fresh for two weeks in an airtight container at room temperature, but I always freeze half the batch—they last 3 months that way. For extra crunch, bake them 2 minutes longer until golden. Store in a dog-proof container (trust me, they'll find a way if left accessible!). The aroma alone will have your pup begging before they even cool—portion control is key for these irresistible treats!
Why You'll Love This Recipe
- No-Mess Mixing: I swear by this recipe because it’s literally three ingredients in a bowl. Applesauce and peanut butter bind the oat flour so well—no egg, no extra steps, just stir until it holds. My hands stay clean, and my dog’s tail wags harder than usual.
- Cinnamon-Peanut Magic: That warm cinnamon-spiced bite from the ground cinnamon? It’s like fall in every bite. The peanut butter adds richness without overpowering, and the applesauce keeps it moist—so much better than dry kibble treats. My pup actually begs for these now.
- Puppy Party Staple: These are my go-to for vet visits, playdates, or just because. Freeze half for training rewards, and the rest stay fresh in the fridge for days. Even my finicky golden retriever (who ignores most treats) goes nuts for them.
- Pantry Hero: I keep a jar of peanut butter, a can of applesauce, and oats on hand just for this. Ground flaxseed adds fiber for my dog’s digestion, and cinnamon’s cheap—no fancy ingredients, just reliable flavor. The recipe stretches to 20+ treats, so it’s budget-friendly too.
Step-by-step instructions for pup-approved peanut butter crunch
These homemade dog cookies are packed with wholesome ingredients and perfect for spoiling your furry friend!
👨🍳 Step 1: Mix Wet Ingredients for Maximum Flavor
In a medium bowl, combine the 0.5 cup unsweetened applesauce, 0.5 cup natural peanut butter, 1 tbsp dog-safe honey, and 0.5 tsp dog-safe vanilla extract. Stir until completely smooth—this mixture should be thick and uniform. The peanut butter adds that irresistible crunch dogs love, while the applesauce keeps them moist without added sugar.
Next, whisk in the 1 whole egg until fully incorporated. The egg acts as a binder, helping the dough hold together beautifully. If you notice the mixture is too thick, add 1-2 teaspoons of water to reach a spreadable consistency. This step is all about creating a cohesive base that will transform into perfect cookies.
🥘 Step 2: Combine Dry Ingredients for Perfect Texture
In a separate large bowl, whisk together the 1.5 cups oat flour, 0.25 cup ground flaxseed, 1 tbsp ground cinnamon, and 0.5 tsp baking powder. The oat flour gives these cookies their signature chewiness, while the flaxseed adds a healthy omega-3 boost. The cinnamon isn't just for flavor—it also helps regulate blood sugar in dogs.
Gently fold in the 0.25 cup finely grated dog-safe carrot, 0.25 cup chopped dog-safe blueberries, and 0.25 cup dog-safe pumpkin puree. The carrots and blueberries add natural sweetness and essential vitamins, while the pumpkin puree contributes fiber and moisture. Mix until just combined—overmixing can make the cookies dense, so stop when you see a few dry spots remaining.
🍳 Step 3: Incorporate Butter and Create the Dough
Cut the 0.25 cup cold unsalted butter into small cubes and add them to the wet ingredient mixture. Using a wooden spoon or silicone spatula, gently fold the butter into the wet ingredients until it's fully incorporated. The cold butter should create small pockets in the dough, which will create those delicious flaky layers when baked.
Now, gradually add the dry ingredient mixture to the wet ingredients, mixing just until everything comes together. The dough will be thick and sticky—this is normal! If it's too sticky to handle, chill it for 10-15 minutes before proceeding. This step is where all the flavors and textures come together to create the perfect cookie dough.
🔥 Step 4: Shape and Bake to Golden Perfection
Preheat your oven to 350°F and line two baking sheets with parchment paper. Using a cookie scoop or tablespoon, portion out the dough into 1-inch balls (this should yield about 24 cookies). Place them 2 inches apart on the prepared baking sheets—they'll spread slightly during baking.
Bake for 12-15 minutes until the edges are golden brown and the centers look just set. The cookies should be firm to the touch but still soft—don't overbake, or they'll become too hard for your pup. For extra crunch, you can bake them for an additional 2-3 minutes until they're slightly darker.
⏰ Step 5: Cool and Store for Maximum Freshness
Allow the cookies to cool on the baking sheets for 5 minutes before transferring them to a wire rack to cool completely. This cooling period is crucial—it allows the cookies to set properly and prevents them from becoming soggy. The aroma of freshly baked dog cookies is simply irresistible, but resist the urge to share with your pup until they're fully cooled.
Store the cookies in an airtight container at room temperature for up to 5 days, or freeze them for up to 3 months. When serving, break them into smaller pieces if needed—these cookies are perfect for training treats or just spoiling your furry friend with some homemade love!
Pro Tips For Making Apple Dog Cookie
- STIR THE FLAXSEED: Mix the ground flaxseed with 3 tablespoons of water first—let it sit for 5 minutes until it thickens into a gel. This keeps your cookies from crumbling into dust when your dog goes for the grab-and-run approach (we’ve all seen it).
- DON’T SKIP THE PEANUT BUTTER TOAST: Spread a thin layer of natural peanut butter on the baking sheet before rolling the dough. The cookies won’t stick, and you’ll save yourself from the heartbreak of a batch flattening into a sad pancake when you pull it out.
- CHILL THE DOUGH: Wrap the mixed dough in plastic and refrigerate for at least 30 minutes. Cold dough rolls cleaner, holds shape better, and bakes more evenly—no more lopsided "dog-shaped" disasters that look like abstract art.
- BAKE LOW AND SLOW: 325°F is your friend here. These cookies spread more than they look, so avoid the urge to crank the oven. A single sheet on the middle rack for 18–22 minutes guarantees chewy, not crispy, results—because nobody wants a dog with a toothache.
Storing and reheating your apple dog cookie
Room-Temp Storage
Keep your freshly baked apple dog cookies in an airtight container at room temperature for up to 5 days. I use glass containers with silicone seals (like Rubbermaid FreshStart) to maintain freshness and prevent moisture loss.
Store them in a cool, dry place away from direct sunlight—your pup will thank you for the crunchy texture! 💛
For extra freshness, place a paper towel between layers if stacking cookies. This absorbs any excess moisture and keeps them from becoming soft. Label the container with the date to track freshness—trust me, these disappear faster than you think!
Freezer Preservation
Freeze half the batch immediately for long-term storage—these cookies last up to 3 months in the freezer without losing quality. Spread them out on a baking sheet and freeze for 1 hour before transferring to a ziplock freezer bag or airtight container.
This prevents sticking and makes them easy to grab for quick treats. ❄️
Thaw cookies at room temperature for 1-2 hours or microwave for 5-10 seconds (covered) if your pup is impatient. I often freeze extras in single-serving portions for training sessions—no need to thaw the whole batch!
Reheating Safely
If your cookies lose their crunch after storage, revive them in a preheated 350°F oven for 3-5 minutes. This restores crispiness without overcooking.
For a quick fix, place cookies on a microwave-safe plate with a damp paper towel and heat on low power for 10 seconds—just enough to soften slightly. 🔥
Avoid reheating in the microwave for more than 15 seconds, or they’ll turn rubbery. Always check the temperature—cookies should reach 165°F if reheating from frozen to ensure safety. Serve warm for extra aroma appeal!
Portion Control Tips
Break larger cookies into smaller pieces (about 1-inch squares) for training treats—this prevents overfeeding while keeping portions manageable. Store individual pieces in small containers or muffin tins for easy grab-and-go access. I keep a stash in my pantry drawer for quick rewards during walks or practice sessions. 🐾
For extra portioning, use a cookie cutter (like a 1-inch circle cutter) to create uniform training treats. This also makes it easier to track how many your pup consumes—perfect for weight management! Always monitor your dog’s reaction to new treats, especially the first time.
Nutrition facts
Frequently asked questions
Can I substitute peanut butter if my dog has allergies?
Use sunflower seed butter or oat butter as a safe alternative—just confirm it's xylitol-free. For dogs with nut allergies, pumpkin puree or mashed banana can replace peanut butter while keeping the recipe moist and flavorful. Always introduce new ingredients gradually to monitor your pup's reaction.
Why do your cookies need an egg? Can I make them egg-free?
The egg acts as a binder for structure, but you can easily replace it with a flax egg (1 tbsp ground flaxseed + 3 tbsp water). Let it sit for 5 minutes to thicken before mixing. This works perfectly for vegan or allergy-sensitive pups while maintaining the same chewy texture. The dough may be slightly stickier, so chill it for 10 minutes before shaping.
How do I adjust the recipe for extra-large or giant breeds?
For big dogs, simply double the entire recipe and bake on three sheets. The 1-inch ball size works well for most breeds—just break larger cookies into 2-inch pieces for portion control. For training treats, cut them into 1/2-inch squares instead. Always monitor portion sizes based on your dog's weight and activity level.
My dog ate the dough raw—is that safe?
While small amounts of raw dough are generally safe, avoid feeding it regularly. The raw egg and flaxseed can cause mild stomach upset if consumed in large quantities. Bake the cookies thoroughly to 165°F for safety. If your dog ate a significant amount, monitor for vomiting or diarrhea—contact your vet if symptoms appear.
Can I add other fruits or veggies to these treats?
Yes! Stick to dog-safe options like blueberries, grated zucchini, or steamed sweet potato. Avoid grapes, raisins, or citrus. For variety, try 1/4 cup of pureed dog-safe veggies (like carrots or green beans) as a replacement for the pumpkin. Always introduce new ingredients one at a time to check for allergies.