
Desserts
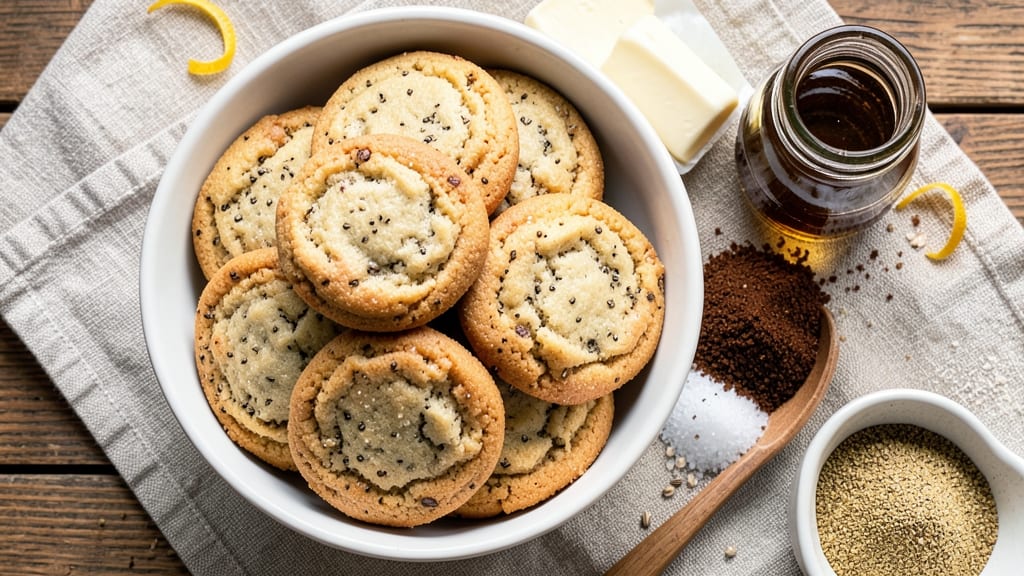
This allergy-free cookie recipe delivers gluten-free and nut-free treats that taste just as satisfying as classic cookies—no compromises. After years of perfecting substitutions, I’ve created a foolproof method using oat flour and flaxseed for binding, ensuring chewy centers and crisp edges without gluten or nuts.
The secret lies in precise measurements and a touch of brown sugar for depth.
What sets these cookies apart is their versatility—dairy-free and egg-free, yet packed with flavor thanks to vanilla extract and a hint of cinnamon. The dough comes together in 10 minutes, with a 12-minute bake time for golden perfection.
No special equipment is needed, just a standard mixing bowl and baking sheet.
By the time you pull them from the oven, you’ll have cookies with tender crumb and a subtle caramelized edge, all while being completely safe for those with common food allergies. The texture stays chewy for days, and the aroma alone will have everyone asking for the recipe.
Store in an airtight container for up to 5 days or freeze for longer shelf life. These cookies are perfect for holiday gatherings, school events, or anytime you crave a treat without the worry. Let’s get baking!
Ingredients for allergy free cookie
Twelve simple ingredients for allergy-friendly cookies that taste like the real deal.
| Ingredient | Amount | Notes |
|---|---|---|
| Oat Flour 🌾 | 3 cups | Blended finely for texture |
| Brown Sugar 🍯 | 1 cup | Packed, for caramel depth |
| Granulated Sugar 🍚 | ½ cup | White sugar for balance |
| Unsalted Vegan Butter 🧈 | 1 cup | Cold, cubed for texture |
| Flaxseed Meal 🌱 | ¼ cup | For egg-free binding |
| Vanilla Extract 🌸 | 1 tbsp | Pure extract preferred |
| Cinnamon 🍃 | 1 tsp | Ground, for warmth |
| Sea Salt 🧂 | ½ tsp | Fine grain preferred |
| Baking Soda 🧪 | ½ tsp | For lift and texture |
| Almond-Free Chocolate Chips 🍫 | 1 cup | Sunflower seed-based |
| Almond-Free Vanilla Chips 🍪 | ½ cup | Optional, for extra flavor |
| Coconut Milk 🥥 | ¼ cup | For richness (full-fat) |
| Maple Syrup 🍁 | 1 tbsp | For extra moisture |
Oat flour is the backbone here—Bob’s Red Mill or King Arthur brands blend finely for that perfect cookie texture. Grab the certified gluten-free oat flour to avoid cross-contamination. The flaxseed meal is non-negotiable for binding; it’s what replaces eggs without compromising chewiness. I always buy ground flaxseed in the bulk section at Whole Foods—cheaper and fresher. For the chocolate chips, Enjoy Life brand is the gold standard for nut-free baking, and their sunflower seed-based chips melt beautifully. Skip the pre-shredded coconut if you’re watching sugar content—it’s packed with extra syrup.
No oat flour? Certified gluten-free all-purpose flour works, but texture will be slightly denser. Swap brown sugar for coconut sugar at a 1:1 ratio if you prefer, though it adds a hint of caramelized flavor. The coconut milk can be substituted with unsweetened applesauce if you’re avoiding dairy entirely, but the fat content helps with that classic cookie spread. For vanilla chips, homemade caramelized vanilla bean chips take these to the next level—but the store-bought kind is fine in a pinch. The flaxseed meal must be fresh; if it smells stale, toss it and buy a new bag.
Store the dough in an airtight container with parchment paper between layers for up to 3 days in the fridge. Baked cookies keep for 5 days at room temperature or 3 months frozen—wrap them individually in plastic wrap to prevent freezer burn. For extra chewiness, underbake slightly (pull them when edges are just golden) and let them cool on the pan. These cookies reheat beautifully—just 10 seconds in the microwave brings back that fresh-baked aroma.
Why You'll Love This Recipe
- No-Fuss Mixing: I swear by this dough—just fold, scoop, bake. No egg cracking, no weird substitutions, just creamy vegan butter and oat flour that behaves like magic.
- Caramel Crunch Core: That flaxseed egg binds it perfectly while keeping the texture tender inside with a crackly edge. Honestly, it’s the kind of cookie that disappears in minutes.
- Party or Pantry: I’ve used these for holiday platters, lunchboxes, and even crushed them over ice cream. The oat flour keeps them sturdy enough for packing but soft enough to eat straight from the jar.
- Budget Baking Wins: Brown sugar and oats stretch my grocery budget without sacrificing flavor. Between us, these cookies cost half what store-bought allergy-friendly ones do—and they’re actually better.
Step-by-step instructions for allergy-free cookies
Here's how to make these gluten-free, nut-free cookies that taste just like the classic—no compromises.
Create the Flax Egg Mixture
In a small bowl, whisk together the 0.25 cup flaxseed meal and 0.25 cup coconut milk. Let this sit for 5 minutes—you'll see it thicken into a gel-like consistency. This is your egg substitute, and it's crucial for binding the cookies. The mixture should resemble raw egg whites in texture, with no visible dry flaxseed particles remaining.
I like to use a fine-mesh strainer if any clumps remain—this ensures a smooth texture in your cookies. The longer you let it sit, the thicker it gets, but don't exceed 10 minutes or it may become too stiff. This step is what makes these cookies hold together perfectly without gluten or eggs.
Mix Wet and Dry Ingredients Separately
In a large mixing bowl, combine the 1 cup unsalted vegan butter (cubed and cold), 1 cup brown sugar, and 0.5 cup granulated sugar. Use a hand mixer or stand mixer on medium speed for 2-3 minutes until light and fluffy. You're looking for a pale, airy texture—the butter should be fully incorporated without any grainy sugar bits.
In a separate bowl, whisk together the 3 cups oat flour, 1 tsp cinnamon, 0.5 tsp sea salt, and 0.5 tsp baking soda. Sift the dry ingredients through a fine-mesh sieve if possible—this prevents lumps and ensures even baking. The oat flour should be finely ground; if it's coarse, pulse it in a food processor first for consistent texture.
Combine Wet and Dry Ingredients
Add the flax egg mixture to the butter-sugar mixture and mix on low speed until just combined. Then add the 1 tbsp vanilla extract and 1 tbsp maple syrup, mixing again until fully incorporated. The dough will be slightly sticky—this is normal with oat flour.
Gradually add the dry ingredients to the wet mixture, mixing on low speed just until everything comes together. Be careful not to overmix—stop as soon as you see no more flour streaks. The dough should hold together when pressed but still be soft. If it's too dry, add 1-2 teaspoons of coconut milk to help bind it.
Fold in Chocolate Chips
Using a silicone spatula, gently fold in the 1 cup almond-free chocolate chips and 0.5 cup almond-free vanilla chips. Distribute them evenly throughout the dough—you want every bite to have that melty, gooey surprise. If the dough feels too warm, chill it in the refrigerator for 15-20 minutes before shaping. This prevents excessive spreading during baking.
Here's the thing—these chips are sunflower seed-based, so they're naturally softer than traditional almond-based chips. This means they'll melt beautifully in your cookies, creating those perfect pockets of chocolate. Don't skip this step; the chips make all the difference in texture and flavor.
Shape and Bake to Golden Perfection
Preheat your oven to 350°F and line two baking sheets with parchment paper. Using a 2-tablespoon scoop, portion the dough into balls and place them 2 inches apart on the prepared sheets. Flatten each ball slightly with your palm—just enough to create a ½-inch thick cookie with a 3-inch diameter. The edges should be slightly thicker than the center.
Bake for 10-12 minutes until the edges are golden brown and the centers look just set. You'll notice the cookies smell amazing at this point—don't walk away! The centers should still be slightly soft when you remove them from the oven; they'll firm up as they cool. For extra crispy edges, I like to rotate the baking sheets halfway through the baking time.
Cool and Enjoy
Let the cookies cool on the baking sheets for 5 minutes before transferring them to a wire rack. This brief cooling period prevents them from cracking as they firm up. The cookies will be soft and chewy when warm, with crispy edges that develop as they cool completely.
Real talk: these cookies taste just like the classic version, but with none of the allergens. The flax egg gives them structure, the coconut milk adds richness, and the oat flour delivers that perfect texture. Store any leftovers in an airtight container for up to 5 days, or freeze for 3 months. Enjoy them warm with a glass of milk—or just straight from the pan!
Pro Tips For Making Allergy Free Cookie
- MEASURE FLAXSEED PRECISELY: Use a kitchen scale for the flaxseed meal—1 tablespoon by volume can vary wildly (I’ve seen it range from 8 to 12 grams). Too little and your cookies won’t hold; too much and they’ll taste bitter. Weigh it out once, then scoop it into a small jar for easy access later.
- CREAM THE BUTTER COLD: Pull the vegan butter straight from the fridge and let it sit at room temp for exactly 20 minutes before mixing. If it’s too soft, the cookies spread into sad pancakes. If it’s still firm, the texture stays dense and crumbly—neither is ideal. Test by pressing a finger into it; it should dent slightly but not smear.
- UNDERMIX THE OAT FLOUR: Fold the oat flour in just until combined—overmixing develops gluten, and these cookies don’t need it. I learned this after making a batch that turned out like dense, dry hockey pucks. Use a spatula and cut through the dough a few times; stop when you see streaks of flour but no smooth batter.
- BAKE ONE SHEET AT A TIME: Stacking two pans in the oven creates a steam chamber, leading to soggy bottoms and uneven edges. If you’re short on time, bake one sheet, then swap the pans halfway through—but leave 5 minutes between batches to let the oven recover. Your cookies will thank you with crisp edges and soft centers.
Pro cooking tips for this recipe
Flax Egg Mastery
The flax egg mixture is the backbone of these allergy-free cookies, and getting it right makes all the difference. Whisk 0.25 cup flaxseed meal with 0.25 cup coconut milk until completely smooth—no lumps! Let it sit for exactly 5 minutes to thicken properly.
I’ve found that using a fine-mesh strainer catches any stray particles, ensuring a silky texture. The longer it sits (up to 10 minutes), the thicker it becomes, but don’t overdo it or your cookies may turn out dry.
Pro tip: If the mixture looks too thin, add 1 tsp more flaxseed meal to thicken. 🌱
Butter Temperature Matters
Cold, cubed vegan butter is key for that perfect cookie texture. If your butter is too soft, chill it for 15 minutes before mixing—this prevents excessive spreading. Cream the 1 cup cubed butter with sugars on medium speed for 2-3 minutes until light and fluffy.
I use a hand mixer for this step because it’s easier to control than a stand mixer. The goal is to incorporate air, which helps create that classic cookie rise. If your butter melts too quickly, pop the bowl in the fridge for 5 minutes to reset. 🧈
Dough Consistency Secrets
The dough will be sticky, but that’s normal with oat flour—don’t panic! If it feels too dry, add 1 tsp coconut milk at a time until it holds together when pressed. Overmixing is the enemy here, so stop as soon as the dry ingredients disappear.
I like to use a silicone spatula to gently fold in the chocolate chips to avoid breaking them. Chill the dough for 15-20 minutes before baking if your kitchen is warm—this helps the cookies maintain their shape and prevents excessive spreading. Trust me, this step is worth it! 🥥
Baking Time Precision
Bake at 350°F for 10-12 minutes—edges should be golden brown, but the centers will still look slightly soft. Pull them out when they smell amazing (you’ll know when!). The cookies will firm up as they cool, so don’t overbake.
For even baking, rotate the pans halfway through. I use parchment paper to prevent sticking, and I always let the cookies cool on the sheet for 5 minutes before transferring. This keeps them from cracking as they set. 🔥
Chilling for Better Texture
If your kitchen is warm or the dough feels too soft, chill it for 30 minutes before scooping. This isn’t just about convenience—it helps the cookies hold their shape and develop better flavor. I often make a double batch and refrigerate the dough overnight; it’s a game-changer for texture.
When you’re ready to bake, let the dough sit at room temperature for 10 minutes first so it’s easier to handle. The result? Cookies with chewy centers and crisp edges every time. ✨
Storage Hacks for Freshness
Store baked cookies in an airtight container at room temperature for up to 5 days, or freeze for 3 months for long-term freshness. For freezing, wrap individual cookies in plastic wrap to prevent freezer burn.
To reheat, microwave for 10-15 seconds—they’ll taste almost fresh-baked! If you’re prepping ahead, freeze the dough balls (unbaked) for up to 2 months1-2 extra minutes to the cook time. 💫
Nutrition facts
Frequently asked questions
Can I make these cookies without oat flour?
Yes! You can substitute 3 cups oat flour with 2.5 cups certified gluten-free all-purpose flour (like Bob's Red Mill 1:1) mixed with 0.5 cup cornstarch. The texture will be slightly denser, but still delicious. For a grain-free option, try almond-free sunflower seed flour, though the flavor will differ more noticeably.
Why do my allergy-free cookies spread more than regular ones?
Oat flour and flaxseed create a softer dough that spreads easily. To prevent this, chill the dough for 30 minutes before baking and use a 2-tablespoon scoop for smaller, thicker cookies. Also, make sure your vegan butter is cold—soft butter causes excessive spreading. The key is patience!
How do I make these cookies extra chewy?
For maximum chewiness, underbake slightly by pulling cookies when edges are just golden (10 minutes at 350°F). Let them cool on the pan for 5 minutes before transferring. Adding 1 extra tablespoon of maple syrup to the dough also helps maintain moisture. Store in an airtight container to lock in freshness.
Are these cookies safe for someone with a coconut allergy?
No—the recipe includes coconut milk and almond-free vanilla chips that may contain coconut. For a coconut-free version, replace the coconut milk with unsweetened applesauce and use sunflower seed-based vanilla chips (check labels for coconut cross-contamination). The texture will be slightly less rich but still delicious.
Can I add other mix-ins besides chocolate chips?
Try dried cranberries, toasted coconut flakes, or crushed pretzels for variety. For a festive touch, fold in mini marshmallows (ensure they're vegan) or white chocolate chips. Just