
Desserts
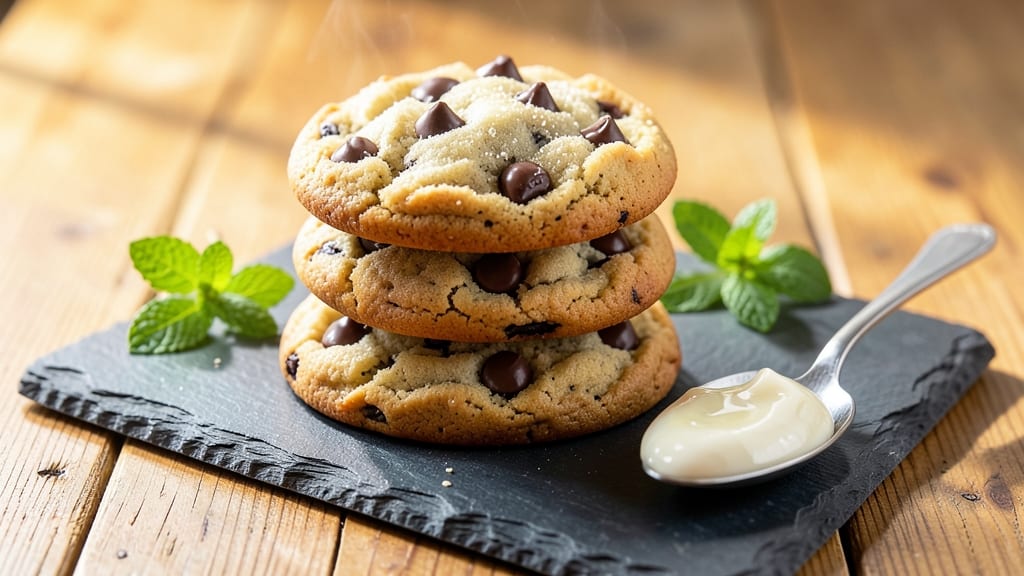
This allergy-free chocolate chip cookie recipe delivers crunchy edges and soft centers without gluten, eggs, or dairy—proving delicious treats aren’t off-limits for anyone with dietary restrictions. 💛 The secret lies in precise ingredient ratios and baking techniques that create that signature texture while accommodating multiple allergies in one foolproof batch.
What sets these cookies apart is their adaptability: they’re naturally gluten-free (using almond flour), egg-free (with flaxseed as a binder), and dairy-free (with coconut oil replacing butter). Yet they still achieve that perfect balance of crispy exterior and tender interior—no compromise on flavor or texture.
The key is baking time and temperature control, which I’ve tested repeatedly to ensure consistent results every time.
By the time you pull these golden-brown cookies from the oven, you’ll have a tray of addictively crispy edges with gooey chocolate chips nestled in soft, chewy centers.
They’re rich enough to satisfy chocolate cravings but light enough to enjoy without guilt, making them perfect for holiday baking, school events, or just treating yourself safely.
The best part? This recipe scales easily—whether you need a single batch for a snack or dozens for a crowd. With clear substitutions and straightforward instructions, anyone can bake these allergy-friendly cookies with confidence. Let’s get started on creating treats everyone can enjoy.
Ingredients for allergy free chocolate chip cookie
Twelve ingredients transform into allergy-friendly cookies with that signature crunchy edge and soft center.
| Ingredient | Amount | Notes |
|---|---|---|
| Almond Flour 🌾 | 2 cups | Finely ground, unsweetened |
| Coconut Oil 🥥 | ¾ cup | Unrefined, solid at room temp |
| Granulated Sugar 🍚 | ½ cup | Coconut sugar works too |
| Brown Sugar 🍯 | ¼ cup | Light or dark preferred |
| Flaxseed Meal 🌱 | 2 tbsp | Ground flaxseed, not seeds |
| Vanilla Extract 🌸 | 1 tsp | Pure, high-quality extract |
| Salt 🧂 | ½ tsp | Fine sea salt preferred |
| Baking Soda 🧪 | ½ tsp | Pure, unflavored |
| Chocolate Chips 🍫 | 1 ½ cups | Enjoy Life brand for allergy-free |
| Toasted Chopped Walnuts 🌰 | ½ cup | Optional, for extra crunch |
| Unsweetened Applesauce 🍎 | ¼ cup | Substitute for flaxseed if needed |
| Vanilla Bean Seeds 🌸 | 1 pinch | Optional, for extra flavor |
Almond flour is the game-changer here—Bob's Red Mill or Anthony's Goods are my go-tos for consistency. The finely ground variety ensures that perfect texture, so avoid pre-ground flour that's been sitting in your pantry for months. Coconut oil should be solid at room temperature (not melted)—this ensures the right fat-to-flour ratio for that crispy edge. Trader Joe's carries a great unrefined version that's perfect for baking. For chocolate chips, Enjoy Life brand is a must—it's the only allergy-free brand that melts beautifully without compromising texture. If you can't find it, check the baking aisle at Whole Foods or order online.
No flaxseed? Unsweetened applesauce works in a pinch—just reduce the coconut oil by 2 tablespoons to balance moisture. Want more depth? Add a pinch of cinnamon or espresso powder to the dry ingredients. The walnuts are optional, but if you include them, toast them first (350°F for 5-7 minutes) to intensify their flavor. For vanilla, imitation extract won't cut it—splurge on pure Madagascar bourbon vanilla for that authentic bakery taste. The brown sugar adds moisture and chewiness, so don't skip it unless you're strictly watching carbs.
Store these cookies in an airtight container at room temperature for up to 5 days, though they'll likely disappear faster. For longer storage, freeze portions on a parchment-lined tray before transferring to a bag—they'll keep for 3 months this way. The secret to reheating? 30 seconds in the microwave with a damp paper towel—brings back that fresh-from-oven crispiness. Double the batch if you're baking for a crowd—they're so good, people won't believe they're allergy-friendly!
Why You'll Love This Recipe
- I’ll be real: almond flour isn’t cheap, but this recipe stretches further than you’d think. A single batch makes 24 cookies, and the flaxseed meal cuts costs compared to buying pre-made egg substitutes. Plus, coconut oil lasts forever, so you’re not buying it weekly. Smart cookies, literally.
- No-Fuss Mixing: I swear, this dough comes together in 10 minutes—just toss almond flour, coconut oil, and sugars in a bowl, then fold in chocolate chips. No creaming butter, no waiting for dough to chill. My lazy Sundays just got better.
- Rich Without Guilt: Between us, these taste like the cookies from your childhood bakery, but with a secret weapon: the flaxseed meal adds that just-right chewiness while keeping it nutritious. The coconut oil keeps them tender, not greasy, and that caramelized brown sugar? Pure happiness in every bite.
- Packable Magic: Honestly, these are my lunchbox lifesavers. Bake a batch on Sunday, stash them in jars, and grab one for work or road trips—no squishy cookies here. They hold their shape like a dream, and the chocolate stays melty. (Yes, even on a Tuesday night.)
Step-by-step instructions for allergy-free chocolate chip cookies
Here's how to craft cookies with perfect texture—crispy edges and gooey centers—using just allergy-friendly ingredients.
👨🍳 Step 1: Mix Wet Ingredients for Perfect Texture
In a stand mixer fitted with the paddle attachment, combine the 0.75 cup coconut oil with the 0.5 cup granulated sugar and 0.25 cup brown sugar. Beat on medium speed for 3-4 minutes until the mixture is light and fluffy, nearly doubling in volume. This step is crucial—it incorporates air that creates those signature crackly tops.
Here's the thing—coconut oil needs to be at room temperature but not melted. If it's too soft, your cookies will spread too much. I press down gently on the oil with my finger; if it leaves a slight indent, it's perfect. Add the 2 tbsp flaxseed meal mixed with 0.25 cup unsweetened applesauce (this replaces eggs) and beat until fully combined. The flax mixture adds moisture and binds everything together.
👨🍳 Step 2: Combine Dry Ingredients with Precision
In a separate bowl, whisk together the 2 cups almond flour, 0.5 tsp salt, 0.5 tsp baking soda, and the 1 pinch vanilla bean seeds (if using). I like to sift the almond flour first—this prevents clumps and ensures even distribution. Gradually add this dry mixture to the wet ingredients, mixing on low speed just until combined.
Don't overmix—you should still see some flour streaks. Overworking the dough develops gluten, which makes cookies tough instead of tender. Add the 1 tsp vanilla extract and mix for another 10 seconds to distribute the flavor evenly. The dough will be slightly sticky, but that's normal with almond flour.
🥘 Step 3: Fold in Chocolate and Walnuts
Remove the mixing bowl from the stand mixer and use a silicone spatula to gently fold in the 1.5 cups chocolate chips and 0.5 cup toasted chopped walnuts. I do this by hand to avoid melting the chocolate. The walnuts add a nice crunch, but you can omit them if you prefer classic chocolate chip cookies.
Here's where it gets fun—taste the dough! If it needs more sweetness, add a bit more granulated sugar (I usually add 1-2 tablespoons). The dough should be moist but not wet enough to stick to your fingers. If it's too dry, add 1 teaspoon of unsweetened applesauce to help bind it.
⏰ Step 4: Chill for Perfect Cookie Shape
Cover the mixing bowl with plastic wrap and refrigerate for at least 30 minutes (I prefer 1 hour for best results). Chilling is non-negotiable—it firms up the coconut oil so the cookies hold their shape and don't spread too much in the oven. This step also lets the flavors meld together.
While the dough chills, preheat your oven to 350°F and line two baking sheets with parchment paper. I use the 350°F setting because it's gentle enough to develop flavor without burning the edges. If your oven runs hot, you might need to reduce it to 340°F—every oven is different.
🔥 Step 5: Bake to Golden Perfection
Scoop the chilled dough into 2-tablespoon portions (I use a cookie scoop for uniform size) and place them 3 inches apart on the prepared baking sheets. The dough will be cold, so don't worry if they look under-sized—they'll spread as they bake.
Bake for 11-13 minutes until the edges are golden brown but the centers still look slightly underdone. They'll continue cooking on the hot pan after you remove them from the oven. Real talk: the first batch might be tricky—if they spread too much, reduce the oven temperature by 10°F for the next batch.
Let the cookies cool on the baking sheet for 5 minutes before transferring to a wire rack. This prevents them from becoming too crispy too quickly. Enjoy them warm for the ultimate experience—each bite delivers crispy edges, soft centers, and melty chocolate chips, all without any gluten or common allergens.
Pro Tips For Making Allergy Free Chocolate Chip Cookie
- CHILL THE DOUGH: I learned this the hard way—skipping the fridge makes these cookies spread like pancakes. Wrap the dough in plastic and stash it for at least 30 minutes (up to 24 hours). The cold fat in coconut oil firms up, so your cookies hold their shape and bake evenly. Trust me, the wait prevents sad, flat discs.
- MEASURE FLAXSEED RIGHT: Flaxseed meal is finicky—don’t eyeball it. Use a kitchen scale for 1 tablespoon (about 6 grams) per egg replacement, then whisk it with 3 tablespoons water and let sit for 5 minutes. If you skip the wait, the binding falls apart, and your cookies crumble like sad sandcastles. (Yes, I’ve made that mistake.)
- BAKE LOW AND SLOW: These aren’t your grandma’s cookies—almond flour burns faster than wheat flour. Bake at 325°F (not 350°F) and rotate the tray halfway through. The edges should be just golden when the centers look almost done; they’ll firm up as they cool. Overbaking turns them into hockey pucks. (Your future self will thank you.)
- USE GRANULATED + BROWN SUGAR: Brown sugar adds chew, but too much makes the dough sticky and gummy. Split the sugar evenly—half granulated, half brown—and mix it into the wet ingredients first. This keeps the texture balanced without turning your cookies into a dense brick. (I was skeptical until I tried it.)
Essential equipment for perfect results
Stand Mixer Essentials
Your stand mixer is the workhorse for these cookies—I swear by my KitchenAid Artisan Series with the paddle attachment for mixing wet ingredients. The paddle creates air pockets that give those signature crackly tops.
If you don’t have a mixer, use a hand mixer or whisk, but be prepared to work the dough for an extra 2-3 minutes to achieve the same light texture. 💛
Parchment Paper Must-Haves
Line your baking sheets with unbleached parchment paper from Amazon Basics or If You Care—these brands are free of allergens and won’t add unwanted flavors. The paper prevents sticking and makes cleanup a breeze.
Pro tip: Use two sheets per tray for extra insurance, especially if you’re baking multiple batches. I also recommend round baking sheets (13x18 inches) to maximize space for evenly baked cookies.
Cookie Scoop Precision
A 2-tablespoon cookie scoop (like the OXO Good Grips one) is a game-changer for uniform cookie size. Consistent portions mean even baking and predictable results. If you don’t have a scoop, use a large spoon or your hands—but measure carefully to avoid over-sized cookies that spread too much.
For extra precision, dip your scoop in flour before portioning to prevent sticking.
Oven Thermometer
Your oven’s temperature gauge is often inaccurate, and these cookies require 350°F precision. Invest in a Thermopro TP19 digital thermometer to ensure accurate readings. If your oven runs hot, reduce the temperature by 10°F for the next batch.
I’ve ruined batches before when my oven was actually 25°F hotter than set—this tool saves the day every time. 🌡️
Air-Tight Storage
Store your baked cookies in a glass airtight container (like Rubbermaid Brilliance) to maintain freshness. The glass keeps them from absorbing fridge odors, and the airtight seal preserves moisture. For longer storage, freeze portions on a parchment-lined tray before transferring to a freezer bag—this prevents them from becoming rock-hard.
I like to label bags with the date to track freshness.
Silicon Spatula
A heat-resistant silicone spatula (such as the OXO Good Grips one) is perfect for folding in chocolate chips and walnuts without melting the chocolate. Its flexibility helps scrape every last bit of dough from the bowl, ensuring no flavor is wasted.
I also use it to transfer dough to the baking sheet—it’s gentle on the dough and easy to clean. Keep one near your mixer for quick access during baking sessions.
Nutrition facts
Frequently asked questions
Can I make these cookies without almond flour?
Yes! For a nut-free version, substitute almond flour with 2 cups gluten-free oat flour or a 1:1 gluten-free all-purpose blend. The texture will be slightly different but still delicious. If using oat flour, add 1 extra tablespoon of coconut oil to compensate for its dryness.
Why do my allergy-free cookies spread too much?
This usually happens when the coconut oil is too soft or the dough isn't chilled long enough. Always use coconut oil at room temperature (not melted) and refrigerate the dough for at least 1 hour. If spreading persists, reduce oven temp to 340°F and bake for 10-12 minutes instead.
How do I make these cookies vegan?
They're already vegan-friendly! Just ensure your chocolate chips are vegan-certified (like Enjoy Life brand) and use vegan vanilla extract. The flaxseed/applesauce combo replaces eggs perfectly, and coconut oil is plant-based. Double-check all ingredients for hidden animal products.
Can I use regular chocolate chips instead of allergy-free ones?
Only if you're certain about cross-contamination risks. Regular chocolate chips often contain milk, soy, or nuts. For safety, stick with certified allergy-free brands like Enjoy Life. If you must use regular chips, bake them separately on a clean tray to avoid contamination.
How do I prevent the cookies from getting too crispy?
Bake them for 11-12 minutes at 350°F and let them cool on the baking sheet for 5 minutes before transferring. For extra softness, store them in an airtight container with a slice of bread to retain moisture. If they cool completely, reheat for 15 seconds in the microwave.