
Desserts
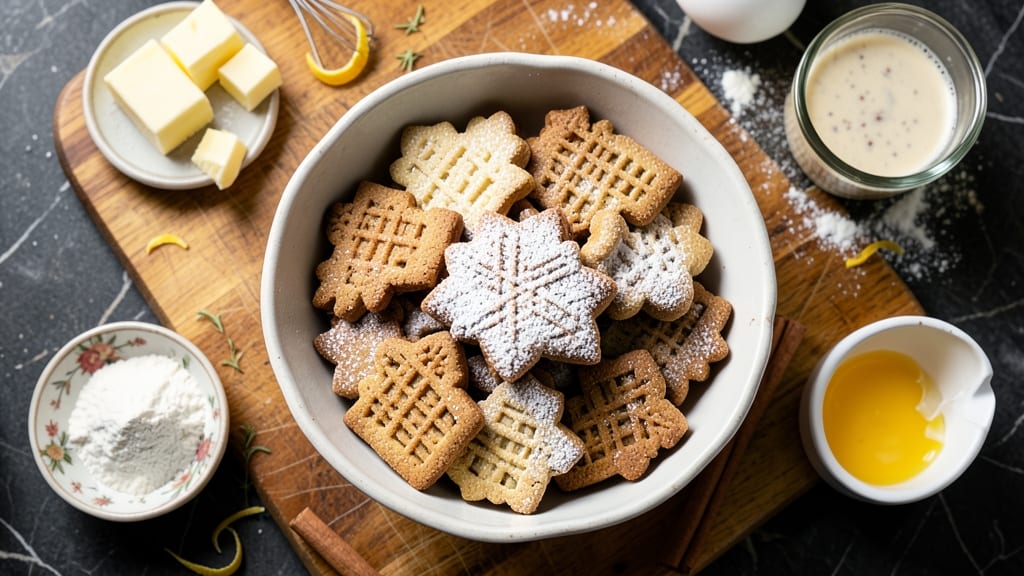
This buttermilk cutout cookie recipe delivers golden edges and soft vanilla centers that melt in your mouth—perfect for holidays or weekend baking. The secret lies in chilling the dough just enough to prevent spreading while keeping the texture tender.
I’ve perfected this technique over years of baking, and it never fails to impress. What sets these cookies apart is the tangy buttermilk, which adds depth while keeping the flavor bright.
Using vanilla bean paste instead of extract elevates the flavor profile, and a touch of cornstarch ensures crisp edges without sacrificing softness. The dough is simple but requires patience—rolling, chilling, and cutting require care, but the results are worth it.
By the time they emerge from the oven, you’ll have cookies with perfectly crisp edges and soft, pillowy centers, all with that signature buttermilk tang. The vanilla flavor shines through, making them ideal for gifting, decorating, or enjoying plain with a glass of milk.
For extra flair, brush with egg wash and sprinkle with colored sugar before baking. These cookies freeze beautifully, too, so you can bake ahead for parties or holidays. Let’s get started!
Ingredients for buttermilk cutout cookie
Buttermilk, vanilla, and cornstarch transform simple dough into melt-in-your-mouth cookies with crisp edges.
| Ingredient | Amount | Notes |
|---|---|---|
| All-Purpose Flour 🌾 | 3 cups | Sifted for light texture |
| Unsalted Butter 🧈 | 1 cup | Cold, cubed for cutting |
| Granulated Sugar 🍚 | 1 cup | Superfine preferred for smoothness |
| Packed Brown Sugar 🍚 | ½ cup | Lightly packed |
| Buttermilk 🥛 | ¾ cup | Room temperature |
| Large Eggs 🥚 | 1 whole | Room temperature |
| Vanilla Bean Paste 🌿 | 1 tbsp | Seeds scraped in |
| Cornstarch 🌾 | 1 tbsp | For crisp edges |
| Salt 🧂 | ½ tsp | Fine sea salt |
| Vanilla Extract 🍯 | ½ tsp | Pure vanilla preferred |
| Cookie Cutters 🎂 | 1 package | Assorted shapes preferred |
| Colored Sugar 🍬 | ¼ cup | For decorating (optional) |
| Egg Wash 🥚 | 1 tbsp | 1 egg yolk + 1 tsp milk |
The buttermilk is non-negotiable here—it’s what gives these cookies that signature tang and tender crumb. Store-bought buttermilk works fine, but if you’re feeling fancy, make your own by mixing milk with lemon juice or vinegar. For the vanilla, vanilla bean paste is worth the splurge—it’s richer than extract and those little seeds add depth. I always grab mine from Williams Sonoma or Sur La Table when I’m baking a big batch. The cornstarch is the secret to those crisp edges—don’t skip it, even if your recipe doesn’t call for it. And if you’re using superfine sugar, no need to pulse it in the food processor—it’s already fine.
No buttermilk? Substitute with 3/4 cup milk + 1.5 tsp vinegar—just let it sit for 5 minutes first. Short on vanilla bean paste? Pure vanilla extract at double the amount works in a pinch, but you’ll miss those little specks of vanilla. The cookie cutters can be any shape you like—holiday-themed ones are fun for special occasions, but basic stars or circles work every time. If you’re decorating, colored sugar from Trader Joe’s is my go-to—it’s vibrant and stays bright. For the egg wash, just yolk + milk gives that glossy finish without making the cookies too soft.
The dough needs to chill for at least 2 hours—this is non-negotiable for those perfect edges. Wrap it tightly in plastic and pop it in the fridge. Once cut, the cookies can wait on a tray in the fridge for up to 4 hours before baking. Baked cookies stay fresh for 5 days in an airtight container, but they freeze beautifully too—just wrap them individually in plastic wrap and freeze for up to 3 months. I always bake a double batch and freeze half for when I need a quick treat.
Why You'll Love This Recipe
- No Mixer Needed: I swear by this dough—just creaming butter and sugars, then folding in buttermilk straight from the fridge. The flour comes together in seconds, and no one will guess it’s that simple.
- Buttermilk Magic: That tangy buttermilk isn’t just an ingredient—it’s the secret. The cookies stay soft in the middle with just the right crisp at the edges, and the brown sugar caramelizes into this addictive chew.
- Holiday or Snack: Shape them into stars for Christmas, use cookie cutters for birthdays, or just drop spoonfuls for a quick dessert. They freeze perfectly too, so I always make a double batch.
- Pantry Staple: You’ve got flour, sugar, butter—chances are, you’ve got buttermilk lurking in your fridge. No fancy swaps, no extra shopping, just pure, reliable cookies every time.
Step-by-step instructions for buttermilk cutout cookies
Here's how to make these tender, vanilla-kissed cookies with crisp edges and soft centers.
Cut the Cold Butter into the Dry Ingredients
Place the 1 cup unsalted butter in a large mixing bowl and cut it into small cubes with a sharp knife. I like to use my chef's knife for this—it gives me better control than a dull butter knife. Add the 3 cups all-purpose flour, 1 tablespoon cornstarch, ½ teaspoon salt, and ½ teaspoon vanilla extract to the bowl. Using a pastry cutter or your fingers, work the butter into the flour mixture until you have pea-sized crumbs with some larger butter pieces remaining.
This cold butter method creates pockets of fat that melt during baking, resulting in those signature tender cookies. If the mixture feels too dry, add 1-2 tablespoons of ice water to help it come together. You want a texture that's crumbly but holds when pressed—like wet sand.
Mix in Wet Ingredients for a Soft Dough
In a separate bowl, whisk together the 1 cup granulated sugar, ½ cup packed brown sugar, 1 whole large egg, 1 tablespoon vanilla bean paste, and ¾ cup buttermilk. The buttermilk should be at room temperature—this ensures it blends smoothly without curdling. Pour this wet mixture into the dry ingredients and stir gently with a wooden spoon until just combined.
Here's the thing—don't overmix. You're looking for a dough that comes together but still has some texture. If it feels too sticky, chill it for 10 minutes before proceeding. The dough should be soft but manageable, not sticky enough to leave your hands covered in dough. Press a small amount between your fingers—it should hold together but still feel tender.
Chill the Dough for Perfect Cutouts
Divide the dough into two equal portions and flatten each into a ½-inch thick disk. Wrap each disk tightly in plastic wrap and refrigerate for at least 1 hour. This chilling step is non-negotiable—it prevents the cookies from spreading too much in the oven and makes them easier to handle when cutting. I like to press the dough disks against the wrap to create smooth, even surfaces for cleaner cuts.
While the dough chills, preheat your oven to 350°F and line two baking sheets with parchment paper. The dough should be firm enough to hold its shape when cut but still tender enough to create those soft centers. If you're in a hurry, you can chill the dough for 30 minutes in the freezer instead—just don't skip this step entirely.
Cut and Bake for Golden Edges
Remove one dough disk from the refrigerator and roll it out on a lightly floured surface to about ¼-inch thickness. Use your cookie cutters to create shapes—press down firmly for clean edges. Place the cutouts on the prepared baking sheets, spacing them about 2 inches apart to allow for spreading. Repeat with the second disk of dough.
Bake for 8-10 minutes until the edges are golden brown but the centers still look slightly underdone. They'll continue cooking on the hot baking sheet after you remove them from the oven. Watch carefully—they go from perfect to overdone in seconds. Rotate the baking sheets halfway through for even baking if your oven has hot spots.
Decorate and Finish with Egg Wash
Remove the cookies from the oven and let them cool on the baking sheets for 2 minutes before transferring them to a wire rack. While they're still warm, brush the tops with the 1 tablespoon egg wash (mixed egg yolk and milk) for that classic buttermilk cookie sheen. Sprinkle with ¼ cup colored sugar if you're feeling festive—it adds a fun touch without overpowering the vanilla flavor.
Let the cookies cool completely before serving. The centers should be soft and slightly cakey, while the edges remain crisp. These cookies taste best at room temperature, so if you're making them ahead, store them in an airtight container for up to 5 days. The buttermilk keeps them moist longer than your average sugar cookie.
Pro Tips For Making Buttermilk Cutout Cookie
- CHILL THE DOUGH: I learned this the hard way—skipping the 30-minute fridge rest makes for flat, sad cookies. Even if you're eager to bake, give the dough a solid 20 minutes in the fridge first. The butter firms up just enough to hold its shape when cutting, and the flavor deepens while you wait.
- MEASURE BUTTER COLD: Pack that butter into a measuring cup like you’re stuffing a Thanksgiving turkey—press it down firmly so it’s just under the 1-cup line. If it’s soft or melted, your cookies will spread like gossip at a small-town bake sale. Use a bench scraper to level it off, and keep the bowl in the freezer for 5 minutes if your kitchen’s warmer than a summer day.
- CUT THIN EDGES: The secret to crispy edges (and not chewy centers) is trimming the dough scraps. After rolling, scrape off the outer ½-inch ring—it’s always softer and will turn gummy. Use those scraps for a second batch (or blame the dog if they disappear), but never reuse them in the same tray. Your cookies will thank you with perfect texture.
- SALT THE BUTTERMILK: Skip the extra pinch of salt in the dough—just stir ¼ teaspoon into the buttermilk before mixing. It dissolves completely and seasons every bite evenly, no clumpy surprises. I was skeptical until I tried it: the cookies taste richer without tasting like you’re playing chef. (Yes, even if you’re impatient like me.)
Regional styles of this dish
Southern Comfort
In the American South, these buttermilk cookies are a holiday staple, often shaped like stars or snowflakes for Christmas. I remember my grandmother in Georgia using a wooden rolling pin and antique cookie cutters> passed down for generations.
The key here is letting the dough rest overnight—this deepens the buttermilk flavor and creates that perfect balance of crisp edges and soft centers. Southern bakers often add a pinch of cinnamon or nutmeg to the dough for warmth, especially for Thanksgiving gatherings. 🌟
New England Twist
Up north, these cookies take on a slightly different character with the addition of maple syrup or maple sugar>.
New England bakers swap out some of the granulated sugar for ¼ cup maple syrup in the wet ingredients, giving the cookies a subtle caramel note that pairs beautifully with the buttermilk tang.
The region’s love for holiday cookie platters> means these are often decorated with white chocolate drizzle or crushed pecans for texture. I first tried this variation at a farm stand in Vermont, and it became an instant favorite for winter baking. ❄️
Midwest Homestyle
The Midwest approach focuses on simplicity and heartiness, often doubling the batch for potlucks and church gatherings. Here, bakers frequently add chopped walnuts or pecans> to the dough before cutting, creating a delightful crunch.
The dough is sometimes rolled slightly thicker (⅓-inch) to ensure a heartier cookie that holds up to milk or coffee. I’ve seen these served with a side of vanilla ice cream during summer picnics—trust me, the contrast is magical.
The Midwest also loves to freeze these cookies in layers with parchment paper between each batch for easy serving. 🥛
West Coast Fusion
Out West, these cookies get a modern twist with unexpected ingredients like espresso powder or orange zest>. California bakers often swap ½ teaspoon vanilla extract for ½ teaspoon vanilla + ½ teaspoon espresso powder to enhance the buttermilk’s richness.
For a citrusy kick, add 1 teaspoon orange zest to the wet ingredients—it brightens the flavor perfectly. These cookies are also popular at coffee shops> in Portland and Seattle, where they’re served with a side of cold brew for dipping.
The West Coast version is all about balancing tradition with innovation. ☕
Texas-Style Spiced
In Texas, these cookies take on a bold, spiced character with the addition of chili powder> or cayenne pepper>. A pinch of ½ teaspoon chili powder in the dry ingredients adds a subtle warmth that pairs surprisingly well with the buttermilk’s tang.
For extra heat, sprinkle ¼ teaspoon cayenne pepper> over the cutouts before baking. These spiced cookies are a hit at BBQ joints> and holiday markets, often served with a side of sweet tea to balance the flavors.
I first tried them at a food truck in Austin, and they’ve been a staple in my holiday baking ever since. 🌶️
Nutrition facts
Frequently asked questions
Why does the dough need to chill before cutting?
Chilling the dough for at least 1 hour prevents excessive spreading while baking and makes the cutouts hold their shape better. The cold butter stays solid longer, creating those signature crisp edges while keeping the centers soft. Skipping this step often results in flat, misshapen cookies.
Can I make these cookies gluten-free?
Yes, but you’ll need to substitute the all-purpose flour with a 1:1 gluten-free flour blend (like Bob’s Red Mill). Add ½ teaspoon xanthan gum to help bind the dough. Expect slightly denser cookies—chill the dough an extra 30 minutes to compensate for the lack of gluten structure.
How do I prevent the cookies from sticking to the parchment paper?
Lightly dust your work surface and rolling pin with flour, but don’t overdo it—the dough should be firm enough to hold its shape. For extra insurance, place the rolled dough on parchment, then freeze for 10 minutes before cutting. This creates a barrier between the dough and paper.
What’s the best way to store leftover cookies?
Store in an airtight container at room temperature for up to 5 days. For longer storage, freeze individual cookies wrapped in plastic for 3 months. Thaw at room temperature—they’ll taste just as fresh! The buttermilk keeps them moist longer than traditional sugar cookies.
Can I use powdered sugar instead of granulated?
Not for this recipe—the texture changes dramatically. Granulated sugar dissolves more evenly, creating that perfect balance of crisp edges and soft centers. If you’re desperate, sift the powdered sugar to remove lumps, but expect slightly denser cookies. The flavor won’t be as bright either.