
Desserts
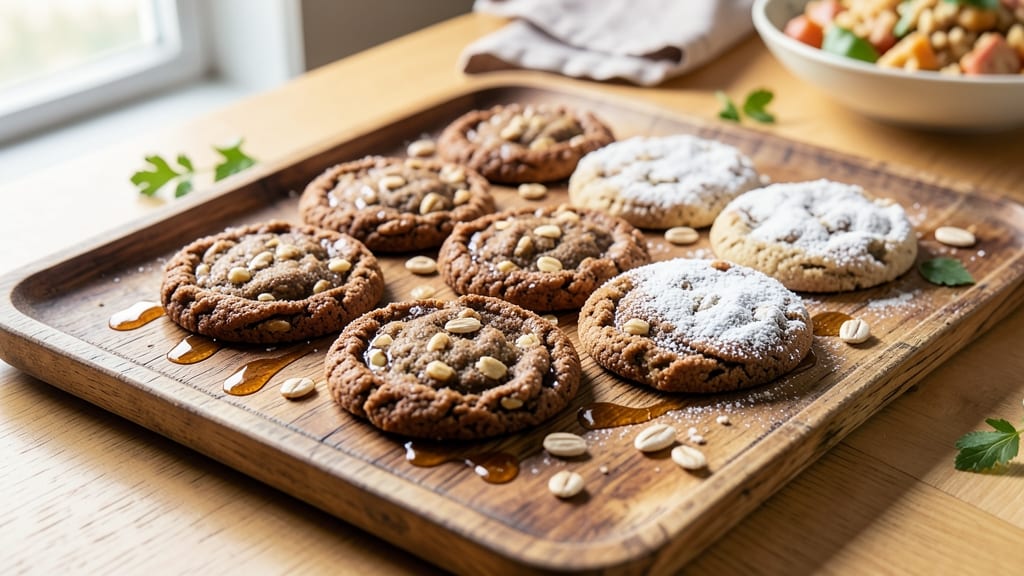
This vegan protein powder cookie recipe transforms your favorite treat into a muscle-friendly snack without sacrificing flavor or texture. 💪 The secret lies in blending plant-based protein powder seamlessly with classic cookie ingredients, creating chewy centers and crisp edges that satisfy any craving while supporting active lifestyles.
What makes these cookies special is their balanced nutrition—each bite delivers 10 grams of plant-based protein from vanilla or chocolate protein powder, along with fiber-rich oats and whole wheat flour for sustained energy. The recipe maintains a foolproof baking process with precise measurements, ensuring consistent results every time.
By the time they emerge from the oven, you'll have golden, aromatic cookies with a subtle protein boost that doesn't compromise on taste. Perfect for post-workout recovery, meal prep, or sharing with friends who love treats that do double duty, these cookies prove healthy eating can be delicious.
The best part? You can customize them with add-ins like dark chocolate chips, peanut butter, or flaxseeds to enhance flavor and texture while keeping the protein content high. Let's get baking!
Ingredients for vegan protein powder cookie
Twenty-four protein-packed cookies with chewy centers and crisp edges—guilt-free indulgence for active lifestyles.
| Ingredient | Amount | Notes |
|---|---|---|
| Vanilla or Chocolate Plant-Based Protein Powder 🥛 | 2 cups | Unflavored or vanilla/chocolate, 10g protein per serving |
| All-Purpose Flour 🌾 | 1 ½ cups | Sifted for light texture |
| Whole Wheat Flour 🌾 | ½ cup | Adds fiber and nuttiness |
| Old-Fashioned Rolled Oats 🥣 | 1 cup | Blended into oat flour |
| Unsweetened Applesauce 🍎 | ½ cup | Replaces eggs, adds moisture |
| Pure Maple Syrup 🍯 | ½ cup | Natural sweetener, grade B for depth |
| Melted Coconut Oil 🥥 | ½ cup | Vegan butter substitute |
| Vanilla Extract 🌿 | 1 tbsp | Pure alcohol-free preferred |
| Almond Milk 🥛 | ¼ cup | Unsweetened, for binding |
| Baking Soda 🧂 | 1 tsp | For lift and crisp edges |
| Salt 🧂 | ½ tsp | Fine sea salt preferred |
| Dark Chocolate Chips (Vegan) 🍫 | 1 cup | 70% cocoa, dairy-free |
| Flaxseeds 🌾 | ¼ cup | Ground, for omega-3 boost |
| Dark Brown Sugar 🍚 | ½ cup | Enhances caramel flavor |
The protein powder is the star here—Orgain or Naked Nutrition work perfectly, but any plant-based powder with at least 20g protein per serving will do. Vanilla or chocolate both work, though vanilla has a cleaner flavor. For the flours, King Arthur brand is my go-to for consistent baking. The oats should be old-fashioned, not quick—blend them into a fine flour for that perfect texture. If you're using a pre-made protein powder with added sweeteners, reduce the maple syrup to 0.375 cup to avoid over-sweetness. Trader Joe's has great options for all these ingredients in one place.
No applesauce? Mashed banana or unsweetened applesauce from a tube works in a pinch, though banana adds moisture and changes flavor slightly. Running low on coconut oil? Avocado oil or melted vegan butter keeps the same richness. The chocolate chips can be swapped for vegan white chocolate or dairy-free caramel bits—just keep the total add-in to 1 cup to maintain texture. Flaxseeds are optional but add that extra nutritional punch; if you skip them, boost the chocolate chips to 1.25 cups for extra indulgence. For a nutty twist, fold in 0.5 cup chopped walnuts or pecans at the end.
These cookies keep for 5 days in an airtight container at room temperature, though they're usually gone in 2 days—they're that good. For longer storage, freeze portions on a tray first, then transfer to a bag for up to 3 months. Reheat in the oven at 300°F for 5 minutes to restore crispness. I like to portion them into muffin-sized bags for easy grab-and-go snacks. The dough can also be chilled for 24 hours if you want to prep ahead—it actually develops better flavor that way.
Why You'll Love This Recipe
- No Mixer Needed: I swear by this—just toss the oats, flours, and protein powder in a bowl, stir in the applesauce, and fold. No electric mixer, no sticky mess, no fuss. The applesauce binds everything like magic, and honestly? It’s the kind of recipe that makes me feel like a baking genius.
- Double-Duty Flavor: That protein powder isn’t just for muscle—it’s for taste. Vanilla brings this warm, slightly nutty sweetness, while chocolate gives you deep, fudgy richness. And the oats? They add a chewy texture that keeps every bite interesting. (Yes, even my picky husband asks for seconds.)
- Snack Attack Ready: These bake into perfect little protein balls that hold their shape—no crumbling, no breaking. I keep a batch in the fridge for post-workout grabs, lunchbox swaps, or when I’m craving something sweet but don’t want to derail my goals. They’re my go-to for when I need energy and dessert.
- Pantry Staple Hack: Between us, this recipe is my secret weapon for using up random flour and oats before they go stale. The applesauce stretches the dough just enough to make a big batch without breaking the bank. Plus, they freeze like a dream—pull one out for a quick treat, no thawing required.
Step-by-step instructions for vegan protein-packed cookies
Here's how to blend plant-based nutrition with bakery-style indulgence—no compromises.
👨🍳 Step 1: Blend Dry Ingredients into Fluffy Base
In a high-speed blender, combine the 2 cups vanilla or chocolate plant-based protein powder, 1.5 cups all-purpose flour, 0.5 cup whole wheat flour, and 1 cup old-fashioned rolled oats. Pulse until you achieve a fine, powdery consistency—this transforms the oats into oat flour while preventing gritty texture. Here's the thing—blending the oats first creates a lighter cookie with better texture than using pre-ground oat flour.
Transfer the blended mixture to a large mixing bowl. Add the 0.25 cup ground flaxseeds, 1 tsp baking soda, and 0.5 tsp salt. Whisk gently to distribute everything evenly. I like to use a whisk here because it aerates the dry ingredients just enough to create that signature cookie crunch without overworking the gluten. This is where the magic starts—your base needs to be perfectly combined before adding any liquids.
🍳 Step 2: Mix Wet Ingredients for Perfect Texture
In a separate bowl, whisk together the 0.5 cup melted coconut oil, 0.5 cup pure maple syrup, 0.5 cup unsweetened applesauce, 1 tbsp vanilla extract, and 0.25 cup almond milk. The coconut oil should be completely melted but not hot—just warm enough to blend smoothly. I always test this by dipping my finger in; it should feel slightly warm but not burning.
Add the wet mixture to the dry ingredients and stir until just combined. You'll notice the dough starts to come together but should still look slightly shaggy. Here's where it gets fun—fold in the 1 cup dark chocolate chips (vegan) and 0.5 cup dark brown sugar by hand using a silicone spatula. Don't overmix; you're looking for a dough that holds together when pressed but still has some texture. The chocolate chips should be evenly distributed throughout.
🥘 Step 3: Chill for Ideal Cookie Shape
Cover the mixing bowl with plastic wrap and refrigerate for at least 30 minutes—I prefer 1 hour if you can wait. This chilling step is non-negotiable for two reasons: First, it firms up the coconut oil so your cookies hold their shape instead of spreading into flat discs. Second, it allows the flaxseeds and protein powder to fully hydrate, creating that perfect chewy-yet-crisp texture.
While the dough chills, preheat your oven to 350°F and line two baking sheets with parchment paper. The reason we wait is that cold dough means even baking and better flavor development. You'll know it's ready when the dough holds its shape when you press a portion between your fingers—no more sticking to your palm.
🔥 Step 4: Bake for Perfectly Balanced Texture
Using a 2-tablespoon cookie scoop, portion the chilled dough onto the prepared baking sheets, spacing them 2 inches apart. The scoop ensures consistent size, which means even baking. Gently press down each portion with your finger—this prevents excessive spreading while creating that classic cookie dome.
Bake for 10-12 minutes until the edges are golden brown but the centers still look slightly underdone. The cookies will continue cooking on the hot pan after removal. Here's the moment that matters: they should pull away from the edges of the parchment paper but still be soft in the center. If you're unsure, do the "touch test"—press gently; they should feel firm but still slightly yielding.
⏰ Step 5: Cool and Enjoy with Nutritional Benefits
Let the cookies cool on the baking sheets for 5 minutes before transferring to a wire rack to cool completely. This brief resting period prevents them from becoming too soft as they cool. The result should be cookies with crisp edges, a chewy center, and pockets of melted chocolate throughout—plus, each serving packs 10g of plant-based protein.
Real talk: these cookies taste like your favorite bakery treats but with a nutritional upgrade. The protein powder adds depth without altering the flavor, while the flaxseeds contribute a subtle nuttiness that complements the chocolate perfectly. Store in an airtight container for up to 5 days or freeze for longer shelf life—just thaw at room temperature before serving.
Pro Tips For Making Vegan Protein Powder Cookie
- CHILL THE DOUGH: I learned this the hard way—skipping the fridge makes for flat, dense cookies. Wrap the dough in plastic and refrigerate for at least 30 minutes (yes, even if you’re impatient like me). The cold fat in the applesauce won’t melt as fast, giving you thicker cookies with that satisfying chew.
- MEASURE THE PROTEIN POWDER: Scoop that protein powder directly from the bag, then level it with a knife—it’s way denser than flour. Packing it in like flour will turn your cookies into protein bricks. A kitchen scale solves this entirely, but if you’re eyeballing it, use a light hand.
- PULSE THE OATS: Blitz those rolled oats in a food processor for 10-15 seconds—just until they’re barely breaking down. Whole oats add texture, but over-processing turns them into flour, which makes the cookies gummy. You want a mix of crunch and softness, not a uniform mush.
- BAKE IN BATCHES: Crowding the pan = steam = soggy cookies. Spread them 2 inches apart on the sheet, and bake in two batches if needed. The protein powder makes these cookies thick, so they need room to breathe. Underbaking slightly (pull them at 345°F, not 350°F) keeps them moist longer too.
Essential equipment for perfect results
High-Speed Blender
Your first essential tool is a high-speed blender—I use my Ninja BN601 for this recipe. The blender transforms rolled oats into fine oat flour, which prevents gritty texture in the final cookies.
A regular blender won’t cut it; you need at least 1,000 watts for proper blending. If you’re on a budget, the Hamilton Beach 58040 works well for under $50. 💫
Cookie Scoop
A 2-tablespoon cookie scoop is a game-changer for consistent cookie sizes. I recommend the OXO Good Grips—its silicone edges prevent sticking, and the ergonomic handle makes scooping effortless. Without one, you’ll end up with uneven cookies that bake at different rates.
Pro tip: Chill the scoop in the freezer for 10 minutes before scooping chilled dough to avoid sticking.
Parchment Paper
Line your baking sheets with unbleached parchment paper—I swear by If You Care brand for its non-stick properties. This prevents cookies from sticking and makes cleanup a breeze.
Avoid silicone baking mats if you’re using coconut oil; they can leave a residue. For extra insurance, lightly grease the parchment with coconut oil spray before baking.
Mixing Bowls
Use a large mixing bowl (at least 5-quart capacity) for combining dry ingredients and a medium bowl (3-quart) for wet ingredients. I prefer Pyrex glass bowls because they’re non-reactive and easy to clean.
The large bowl should have smooth sides to prevent dough from clinging—avoid textured bowls that trap moisture.
Measuring Cups
Precision matters in baking, so invest in stainless steel measuring cups—I use the OXO Good Grips set. They’re durable, easy to read, and won’t warp over time. For the flours, spoon and level method is critical: Spoon the flour into the cup, then level it off with a knife.
Packing flour changes the recipe’s chemistry and can make cookies dense. A fine-mesh sieve helps aerate the flour for lighter cookies.
Wire Rack
A wire cooling rack is non-negotiable for even cooling. I keep a 18-inch round rack from Amazon Basics in my kitchen—it’s affordable ($15) and fits my baking sheets perfectly.
Cooling cookies on the rack prevents soggy bottoms and ensures crisp edges. If you’re short on space, prop up a baking sheet with a small bowl to create airflow underneath.
Nutrition facts
Frequently asked questions
Can I use any vegan protein powder in these cookies?
Yes, but choose one with at least 20g protein per serving for best results. Vanilla or chocolate flavors work perfectly, while unflavored may need extra vanilla extract (1.5 tbsp) to mask any bitter notes. Avoid powders with added sweeteners to prevent over-sweetness—reduce maple syrup to 0.375 cup if needed.
Why do my cookies spread too much?
This usually happens when the dough isn't chilled long enough or the coconut oil isn't firm. Always refrigerate for 1 hour and ensure your kitchen is cool (70°F or below). For extra insurance, chill the dough balls for 15 minutes before baking. The edges should hold their shape when pressed gently.
How can I make these cookies gluten-free?
Replace the all-purpose and whole wheat flours with a 1:1 gluten-free baking flour blend (like Bob's Red Mill). For better texture, add 1 tbsp xanthan gum to the dry ingredients. You'll need 1.5 cups total of the blend. The oats should be certified gluten-free, and check your protein powder for cross-contamination warnings.
Can I bake these without an oven?
Use a countertop convection oven (like Ninja Foodi) or even a toaster oven at 350°F for 12-15 minutes. For air fryers, flatten the dough balls slightly and cook at 325°F for 8-10 minutes—they'll be denser but still delicious. Just monitor closely to prevent burning.
What's the best way to boost protein even more?
Add 0.5 cup powdered peanut butter (like PB2) or 0.25 cup ground hemp seeds to the dry ingredients. For a nutty crunch, fold in 0.5 cup chopped walnuts or pecans at the end. Each addition increases protein by about 3-5g per cookie while keeping the texture intact.