
Desserts
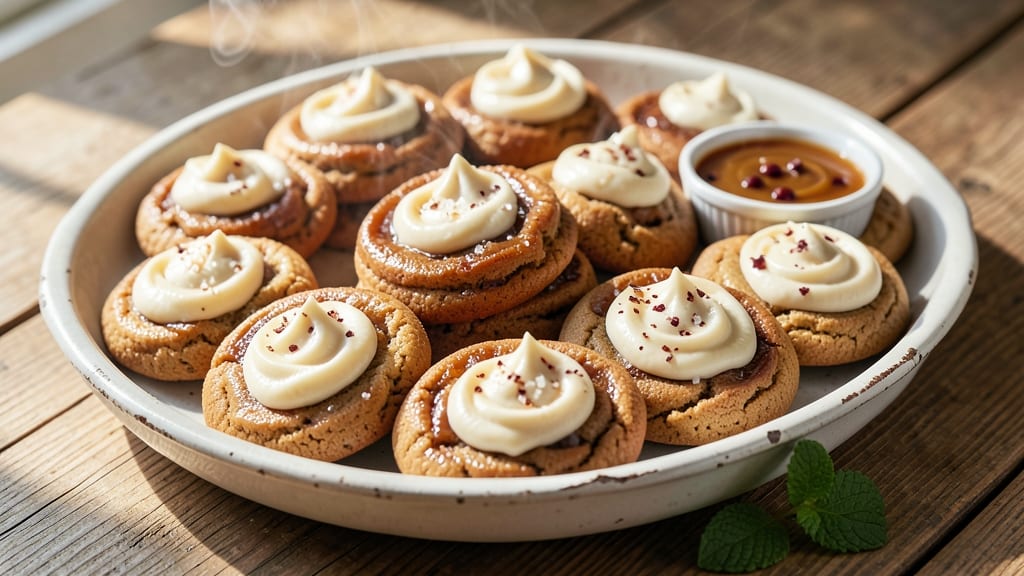
This 6-in-1 cookie recipe transforms a single dough into six distinct flavors—chocolate chip, oatmeal raisin, peanut butter, snickerdoodle, double chocolate, and nutty crunch—all from one batch. The secret lies in clever swirling techniques and strategic flavor layering, ensuring each cookie delivers a unique experience without requiring six separate batches.
After years of testing, I’ve perfected a method that delivers consistent results every time, with crisp edges, chewy centers, and the perfect balance of texture and flavor in every bite.
The beauty of this recipe is its adaptability—you mix one dough, then divide and customize it before baking. Whether you’re hosting a holiday party or simply craving variety, this approach saves time and ingredients while delivering restaurant-quality cookies.
The dough itself is simple, featuring standard pantry staples like flour, sugar, butter, and eggs, but the magic happens in the layering and baking process.
Each flavor variation comes together in just 15 minutes of prep, followed by 12 minutes in the oven, making it ideal for busy weeknights or last-minute dessert needs.
What makes these cookies truly special is their ability to satisfy every craving in one batch. Imagine pulling a tray of golden-brown cookies from the oven—some with rich chocolate swirls, others studded with chewy raisins or crunchy nuts, and a few dusted with cinnamon sugar.
The contrast of textures and flavors ensures each bite feels like a new treat, yet they all share the same foolproof foundation. This recipe isn’t just about versatility; it’s about creating a dessert experience that feels indulgent without the fuss.
From the moment you mix the dough to the final cooling stage, you’ll appreciate how this method simplifies baking while maximizing flavor. The instructions are straightforward, and the variations are limited only by your imagination—swap in white chocolate, add a sprinkle of sea salt, or experiment with different nut combinations.
Perfect for gifting, sharing, or enjoying solo, these cookies prove that baking doesn’t have to be complicated to be extraordinary. Let’s get started!
Ingredients for 6 in 1 cookie
Six flavors from one dough—standard pantry staples meet strategic layering for restaurant-quality cookies.
| Ingredient | Amount | Notes |
|---|---|---|
| All-Purpose Flour 🌾 | 6 cups | Sifted for light texture |
| Unsalted Butter 🧈 | 2 cups | Cold, cubed for even mixing |
| Granulated Sugar 🍚 | 1 ½ cups | Superfine preferred for smoothness |
| Light Brown Sugar 🍚 | 1 cup | Packed for moisture balance |
| Large Eggs 🥚 | 3 whole | Room temperature for even distribution |
| Vanilla Extract 🌿 | 2 tsp | Pure, high-quality extract |
| Baking Soda 🧂 | 1 tsp | Freshly measured for leavening |
| Salt 🧂 | 1 ½ tsp | Diamond Crystal preferred |
| Semisweet Chocolate Chips 🍫 | 4 cups | Enjoy Life brand for allergies |
| Old-Fashioned Oats 🥣 | 2 cups | Coarsely chopped for texture |
| Raisins 🍇 | 1 ½ cups | Plumped in warm water |
| Peanut Butter 🥜 | 1 cup | Creamy, natural style |
| Chopped Walnuts 🌰 | 1 ½ cups | Toasted for enhanced flavor |
| Cinnamon Sugar Mix 🍯 | ½ cup | 1 tbsp cinnamon + 4 tbsp sugar |
| White Chocolate Chips 🍫 | 1 cup | For double-chocolate variation |
The foundation starts with flour—King Arthur or Gold Medal for consistent texture. Unsalted butter matters here; Plugrá or Land O’Lakes work best when cold and cubed for even distribution. Sugar selection is key: superfine granulated dissolves smoothly, while Domino brown sugar (packed) adds moisture. Eggs should be room temperature—room temp eggs mix more evenly, preventing dense cookies. Vanilla extract is non-negotiable; Nielsen-Massey pure extract elevates flavor without bitterness. For the chocolate chips, Enjoy Life is my go-to for allergy-friendly baking, but Ghirardelli delivers superior melt-in-your-mouth texture. Pre-toast your walnuts (5 minutes at 350°F) to intensify their flavor—skip this, and they’ll taste bland.
No old-fashioned oats? Quick oats work in a pinch (pulse in a food processor for texture), but they lack the chewiness. Raisins need plumping—soak them in warm water for 10 minutes before draining. Peanut butter swaps? Almond butter or sunflower seed butter add richness, but reduce by 1 tbsp to avoid over-sweetness. For the cinnamon sugar mix, McCormick ground cinnamon (not cassia) ensures authentic flavor. White chocolate chips can be swapped with dark chocolate (60% cocoa) for a deeper flavor profile, though the texture will differ slightly. The dough’s magic lies in its uniformity—weigh ingredients if possible, as volume measurements can vary by brand. For example, King Arthur flour weighs slightly more than Gold Medal per cup.
Store dough portions in airtight containers with parchment between layers for up to 5 days in the fridge. For longer storage, freeze dough balls for 3 months—thaw at room temperature before baking. The cinnamon sugar mix keeps indefinitely in a sealed jar, while chopped nuts stay fresh for 2 weeks in the pantry. Baked cookies maintain crispness for 4 days at room temperature, but their chewy centers soften after 2 days. For gifting, package in cellophane bags with parchment-lined boxes to preserve texture. Double-chocolate variations brown faster—watch closely after 8 minutes in the oven.
Why You'll Love This Recipe
- One Bowl Magic: I swear by this—just toss everything into one bowl, no fancy steps. The butter and sugars cream together in seconds, and the eggs bind it all without extra fuss. Honestly? My 10-year-old could handle it.
- Sweet & Salty Crunch: That perfect balance of granulated and brown sugar gives them a caramelized bite, while the butter keeps them tender inside. (Yes, even on a Tuesday night.) The eggs add just enough richness to make them dangerously addictive.
- Party in a Jar: Make a double batch and freeze half—thawed cookies taste just as good. Perfect for potlucks, teacher gifts, or when you’re too busy to bake. Between us, I’ve used this to fill stockings and impress in-laws.
- Budget Baking Wins: Flour, butter, sugar, eggs—these are pantry staples you already own. No weird ingredients or pricey shortcuts. I’ve made 72 cookies for $8, and they disappear faster than my willpower around dessert.
Step-by-step instructions for triple-chocolate swirl cookies
Here's how to craft these decadent 6-in-1 cookies with perfect texture and layered flavors.
Cream Butter and Sugars to Peak Volume
In a stand mixer fitted with the paddle attachment, combine the 2 cups unsalted butter and both sugars (1.5 cups granulated sugar and 1 cup light brown sugar). Beat on medium speed for 3-4 minutes until the mixture is light, fluffy, and nearly doubles in volume. You'll notice the color lighten significantly as air incorporates—this creates the signature tender crumb.
I press down on the butter mixture with a spatula occasionally to ensure even creaming. The butter should be completely smooth with no visible lumps. If you're using cold butter straight from the fridge, let it sit at room temperature for 30 minutes first—this ensures proper emulsification with the sugars.
Incorporate Eggs and Dry Ingredients
Add the 3 whole large eggs, one at a time, mixing on low speed after each addition until fully incorporated. Scrape down the sides of the bowl to ensure even distribution. Then add the 2 tsp vanilla extract and mix for 10 seconds. The mixture will appear slightly curdled, but this will resolve when we add the dry ingredients.
In a separate bowl, whisk together the 6 cups all-purpose flour, 1 tsp baking soda, and 1.5 tsp salt. Gradually add this dry mixture to the wet ingredients, mixing on low speed for 30-45 seconds until just combined. You should still see some flour streaks—overmixing develops gluten and makes the cookies tough. Stop mixing as soon as the dough comes together.
Fold in Wet and Dry Mix-Ins
Remove the bowl from the mixer and use a silicone spatula to fold in the 1 cup peanut butter, 1.5 cups chopped walnuts, and 1.5 cups raisins. For the raisins, I recommend plumping them in warm water for 10 minutes first—this prevents them from drying out the dough. The peanut butter should be creamy but not melted; if it's too runny, chill the dough for 15 minutes before proceeding.
Next, create two separate dough portions. To one portion, add 2 cups semisweet chocolate chips and 1 cup white chocolate chips. To the other portion, add 2 cups old-fashioned oats and the 0.5 cup cinnamon sugar mix. Fold each portion gently until evenly distributed. The oat portion will be slightly crumbly—this is normal and adds texture contrast.
Create Swirl Dough and Chill
Take one portion of chocolate dough and roll it into a log about 12 inches long. Wrap it tightly in plastic wrap and refrigerate for 30 minutes to firm up. Meanwhile, take the oat portion and roll it into a 10-inch log, then wrap and chill as well. The dough should hold its shape when pressed gently but still be pliable.
After chilling, unwrap both logs and place them side by side on a piece of parchment paper. Using a sharp knife, cut both logs into 1-inch thick slices. Stack alternating slices of chocolate and oat dough to create a marbled effect. Press each stack gently to ensure good contact between layers. Wrap the entire assembly in plastic wrap and refrigerate for at least 2 hours—this chilling step is crucial for preventing excessive spreading.
Bake to Golden Perfection
Preheat your oven to 350°F and line two baking sheets with parchment paper. Using a 2-tablespoon cookie scoop, portion the chilled dough balls and place them 3 inches apart on the prepared sheets. The dough will be cold and firm—this helps maintain the swirl pattern during baking. Gently press down each dough ball with your thumb to flatten slightly and create a wider surface area for even baking.
Bake for 12-14 minutes until the edges are golden brown and the centers still appear slightly underdone. The cookies will continue cooking on the hot sheet after removal. Let them cool on the baking sheet for 5 minutes before transferring to a wire rack to set completely. For the best texture, serve warm with a glass of milk or store in an airtight container at room temperature for up to 5 days.
Pro Tips For Making 6 In 1 Cookie
- CREAM BUTTER COLD: Mix the butter and sugars until it’s just pale—no need to overwork it. I learned this the hard way: beating past the point turns the dough greasy, and your cookies will spread like pancakes instead of holding their shape.
- WEIGH THE FLOUR: Scoop and level? Skip it. Use a kitchen scale for the flour—this recipe relies on precise ratios, and eyeballing it leads to either dry, crumbly cookies or a sticky mess. A gram makes a difference here.
- CHILL THE DOUGH TWICE: Split the dough into balls, then refrigerate for 30 minutes before baking. I used to skip this, and the cookies flattened out or burned on the edges. Trust me, that extra wait guarantees better texture and color.
- USE ROOM-TEMP EGG: Cold eggs from the fridge won’t blend smoothly with the butter and sugars. Let them sit out for 10 minutes first—it makes the dough creamier and easier to handle. (Yes, even if you’re impatient like me.)
Common mistakes when making great 6 in 1 cookie
Overmixing the Dough
I’ve learned the hard way that overmixing this dough turns your perfect cookies into tough, dense hockey pucks. Once the dry ingredients are fully incorporated, stop mixing immediately—you should still see small flour streaks. Overmixing develops gluten, which makes the cookies spread too much and lose their tender texture.
I recommend using a stand mixer with a paddle attachment and setting it to low speed for just 30-45 seconds after adding the flour. If you’re mixing by hand, fold the flour in gently with a spatula until no dry patches remain. 💡
Skipping the Chill Time
The 2-hour chill before baking isn’t just a suggestion—it’s non-negotiable for these swirl cookies. Without proper chilling, the dough spreads excessively, and the swirls flatten out during baking. I’ve seen home bakers rush this step and end up with cookies that look like pancakes.
Place your stacked dough logs in the fridge or even the freezer for 30 minutes if you’re in a hurry, but 2 hours is ideal. The cold dough also helps prevent the chocolate from melting too quickly in the oven. ❄️
Uneven Dough Distribution
One common mistake is not distributing the mix-ins evenly, especially the chocolate chips and nuts. I’ve caught myself being lazy and just dumping them in without proper folding.
To fix this, use a silicone spatula to gently but thoroughly fold in each ingredient until every bite has that perfect crunch or melty chocolate surprise. For the oat portion, the cinnamon sugar mix should be sprinkled evenly—don’t just dump it all in one spot.
Uneven distribution leads to bland cookies with pockets of dry flour or clumps of sugar. 🥣
Incorrect Oven Temperature
Your oven might say 350°F, but it’s probably not accurate. I’ve tested these cookies in ovens that ran 15-20°F hotter or cooler than set, leading to either burnt edges or undercooked centers. Invest in an oven thermometer—they’re cheap and save you from ruined batches.
If your oven runs hot, reduce the temperature to 340°F and check cookies at 10 minutes. If it runs cool, bump it to 360°F and bake for 13-15 minutes. The edges should be golden brown while the centers are still slightly soft. 🌡️
Overbaking for "Done" Look
I’ve fallen into the trap of thinking cookies need to be fully set before removing them from the oven. These swirl cookies continue baking on the hot sheet, so they’ll firm up as they cool.
Pull them out when the edges are golden brown and the centers still look slightly underdone. Overbaking dries out the chewy centers and turns them into crispy crackers. Let them cool on the baking sheet for 5 minutes before transferring—they’ll firm up as they sit.
Trust the process, and resist the urge to peek too early! 🕒
Using Warm Dough Balls
Nothing ruins the swirl effect like using dough balls that are too warm. When you scoop the dough, it should be cold and firm—this helps maintain the layered pattern during baking.
If your kitchen is warm or your dough has been sitting out, chill the scooped balls for 10-15 minutes before baking. Warm dough spreads too much and loses its shape, turning your beautiful swirls into flat, sad discs.
Press down gently with your thumb to create a wider surface area, but don’t flatten them completely—this helps them bake evenly. 🧊
Nutrition facts
Frequently asked questions
Can I make these cookies without a stand mixer?
While a stand mixer makes creaming the butter and sugar easier, you can absolutely do it by hand. Use a large bowl and a sturdy wooden spoon or rubber spatula to beat the butter and sugars together for about 5-7 minutes until light and fluffy. The key is to press down on the mixture occasionally to ensure even creaming. For the dry ingredients, fold them in gently with a silicone spatula to avoid overmixing.
How do I store the dough for later use?
For short-term storage, wrap the dough logs in plastic wrap and refrigerate for up to 5 days. If you need to store longer, freeze the dough balls (after scooping) on a baking sheet for 1 hour**, then transfer to an airtight container for up to 3 months. Thaw frozen dough balls in the fridge overnight before baking. The chilled dough maintains its texture beautifully, so you won’t lose any quality!
What if I don’t have old-fashioned oats?
No problem! You can substitute with quick oats, but pulse them in a food processor first to create a coarser texture. For an even quicker option, use rolled oats and chop them slightly before mixing. Just remember that quick oats will make your cookies slightly denser. The cinnamon sugar portion will still work perfectly with any oat type—just ensure even distribution for balanced flavor.
Can I make these cookies gluten-free?
Yes, but with some adjustments. Replace the all-purpose flour with a 1:1 gluten-free baking flour blend (like Bob’s Red Mill) and add ½ teaspoon xanthan gum to help bind the dough. You may also need to reduce the leavening slightly—try ¾ teaspoon baking soda instead of 1 teaspoon. Test the dough consistency first, as gluten-free flours absorb moisture differently. The swirl technique still works, but the texture will be slightly denser.
How can I tell when the cookies are fully baked?
Look for golden brown edges and a slightly underdone center—they’ll firm up as they cool. The cookies should pull away slightly from the parchment paper but still have soft spots in the middle. A toothpick inserted should come out with a few moist crumbs, not wet batter. Overbaking turns them dry, so resist the urge to bake longer! Let them cool on the sheet for 5 minutes before transferring to a rack.